
Required Tools
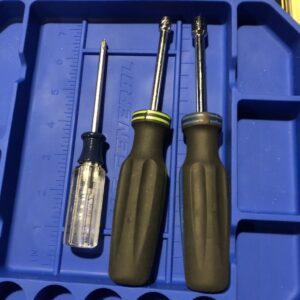
- Small Phillips Screw Driver
- 1/4″ Nut Driver
- 5/16″ Nut Driver
Time Required: 15-30 minutes
Speaker Frame Install Overview
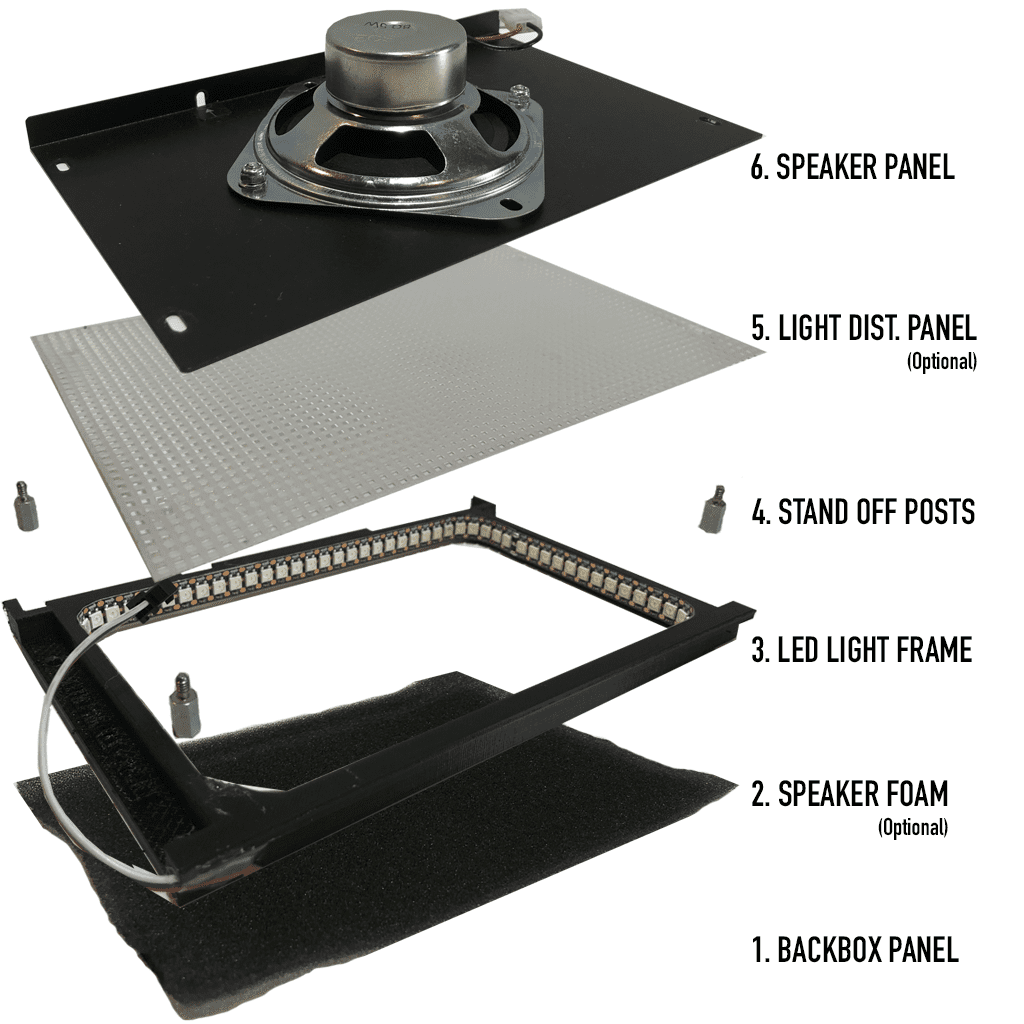
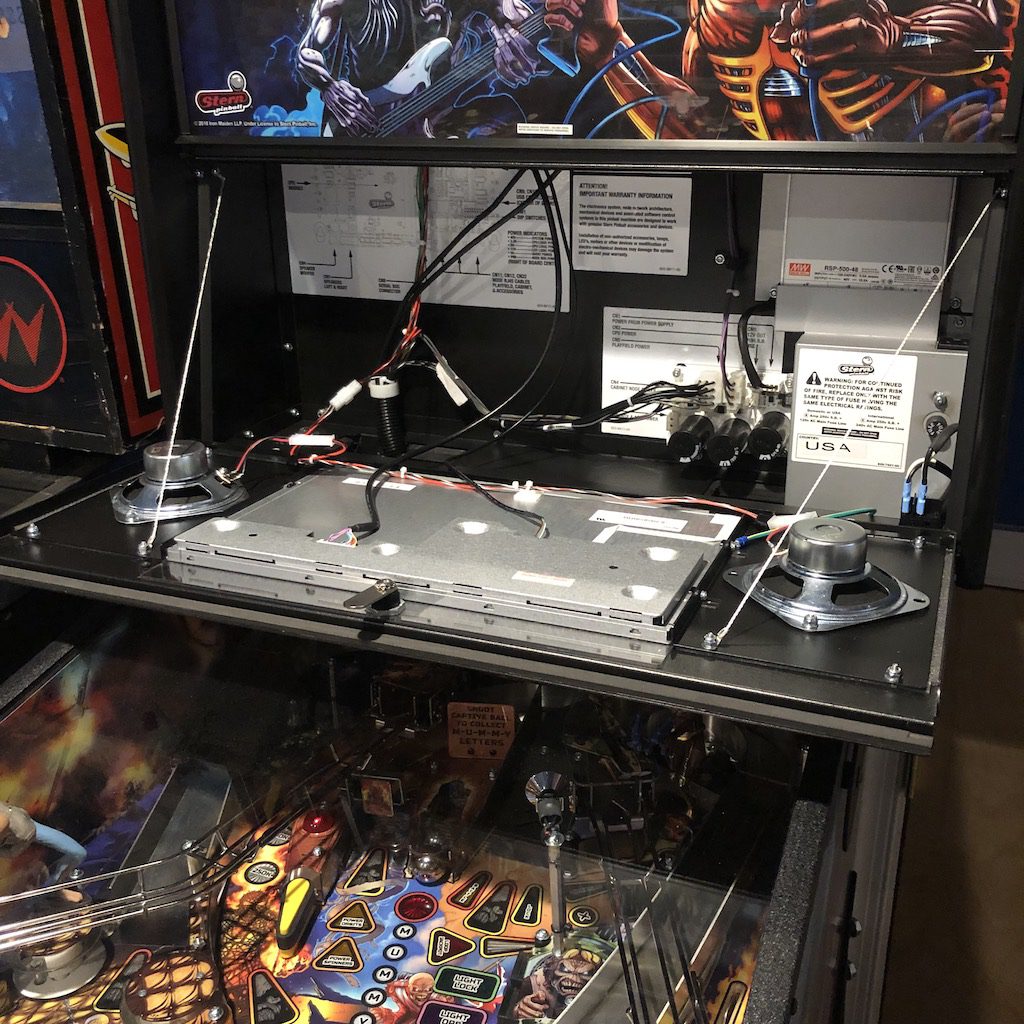
Our advanced speaker kit fits between your back-box panel and the metal speaker panel and becomes the new LCD display mount. During the following instructions, you will remove the speaker panels one at a time and install our system light system between the back-box and the speaker panel.
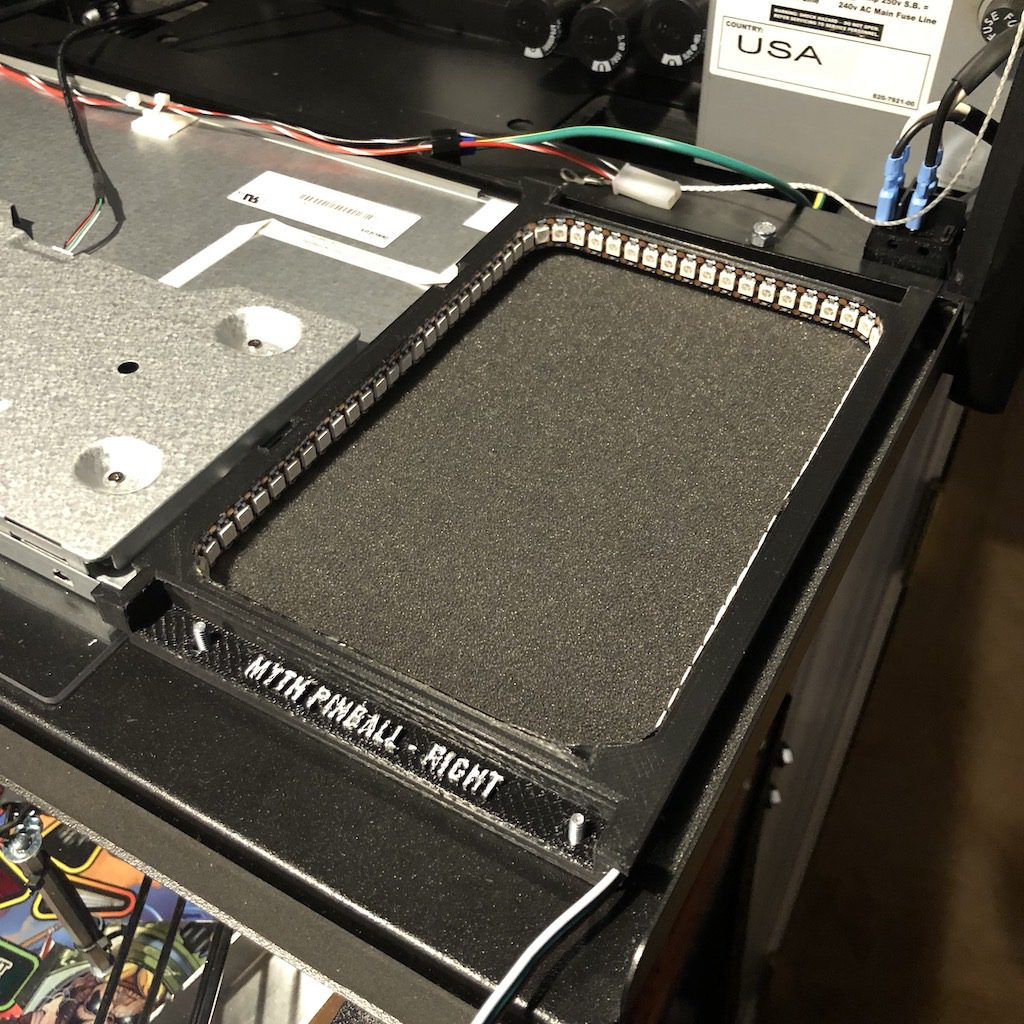
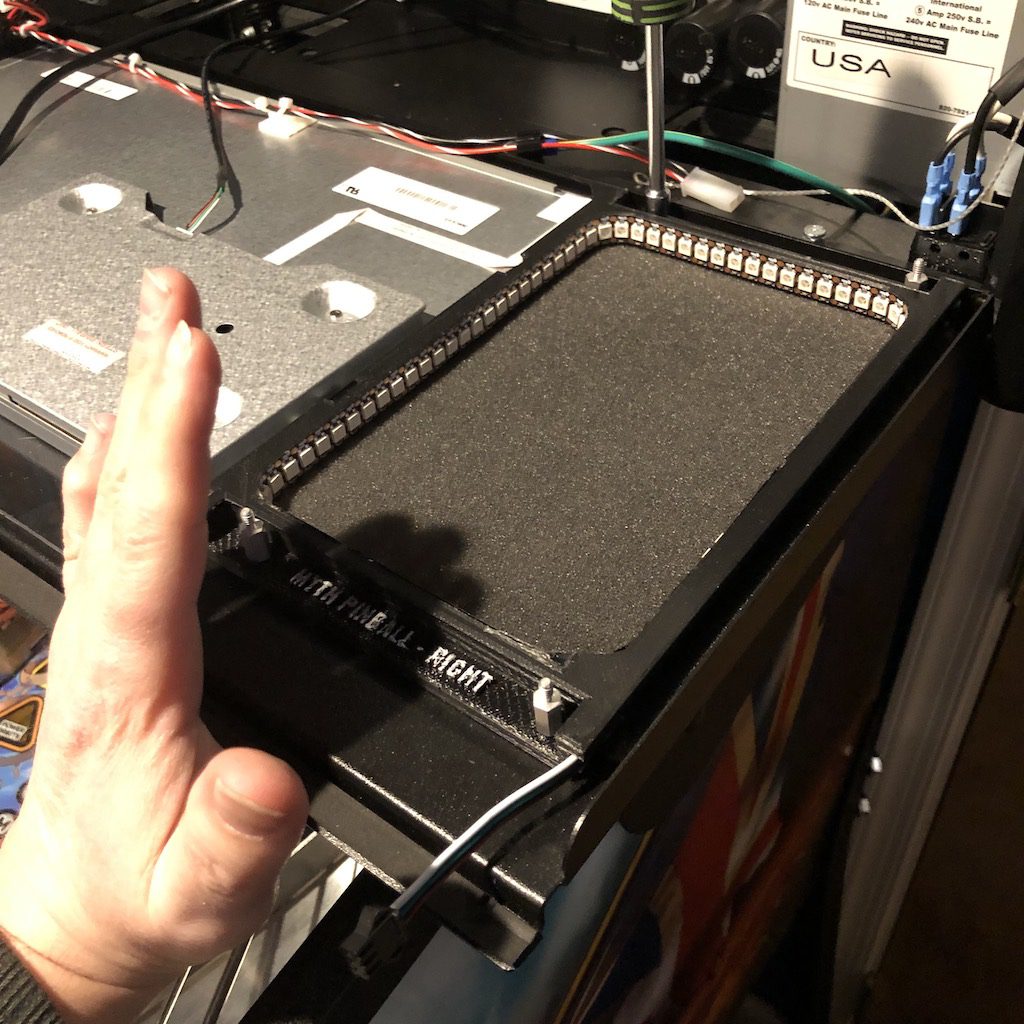
Step 1 – Prepare Right Side Light Frame
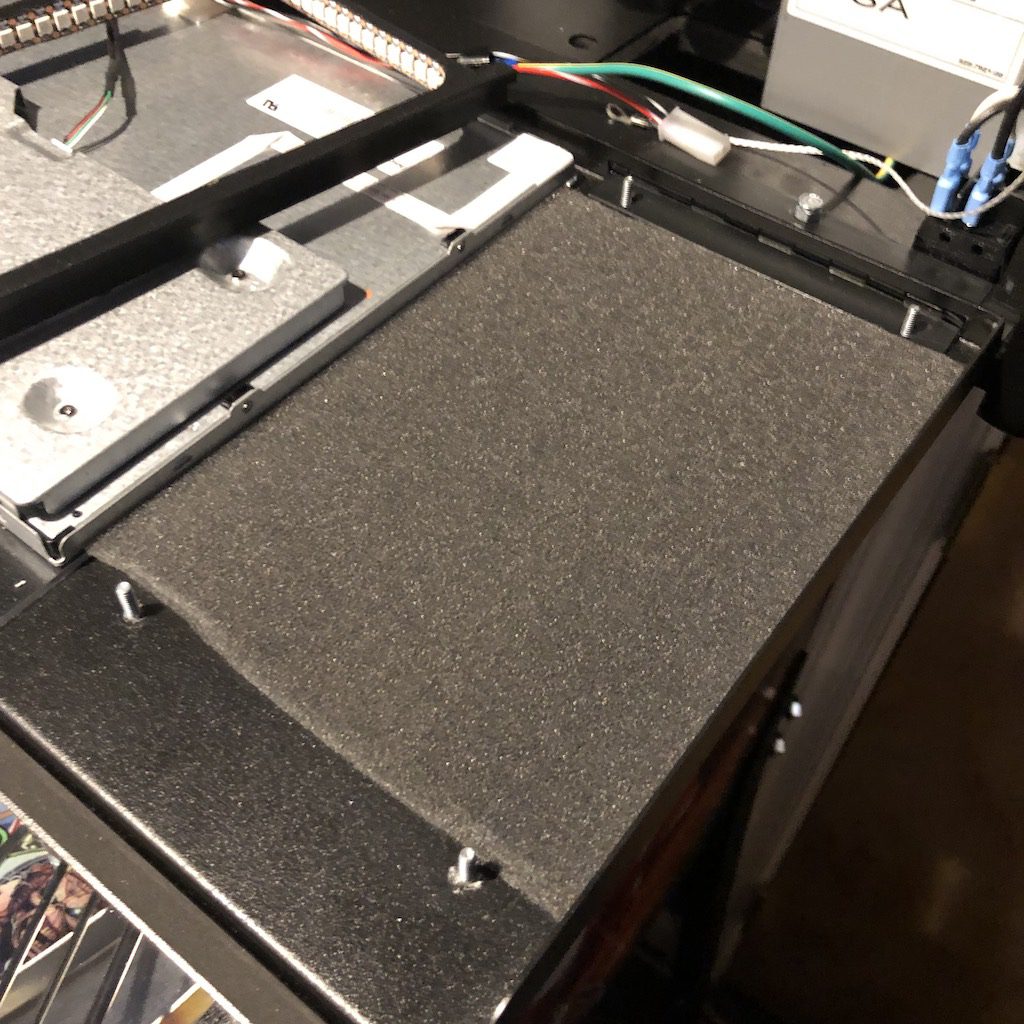
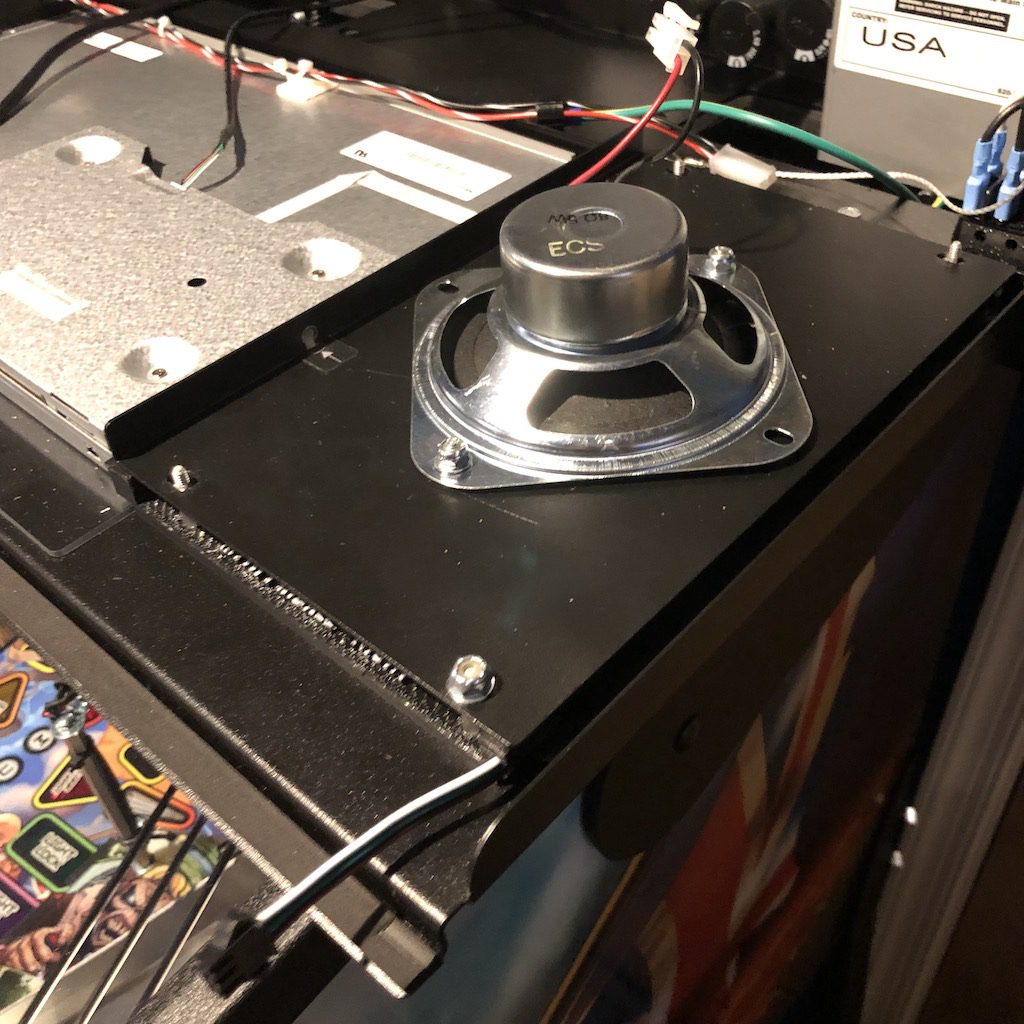
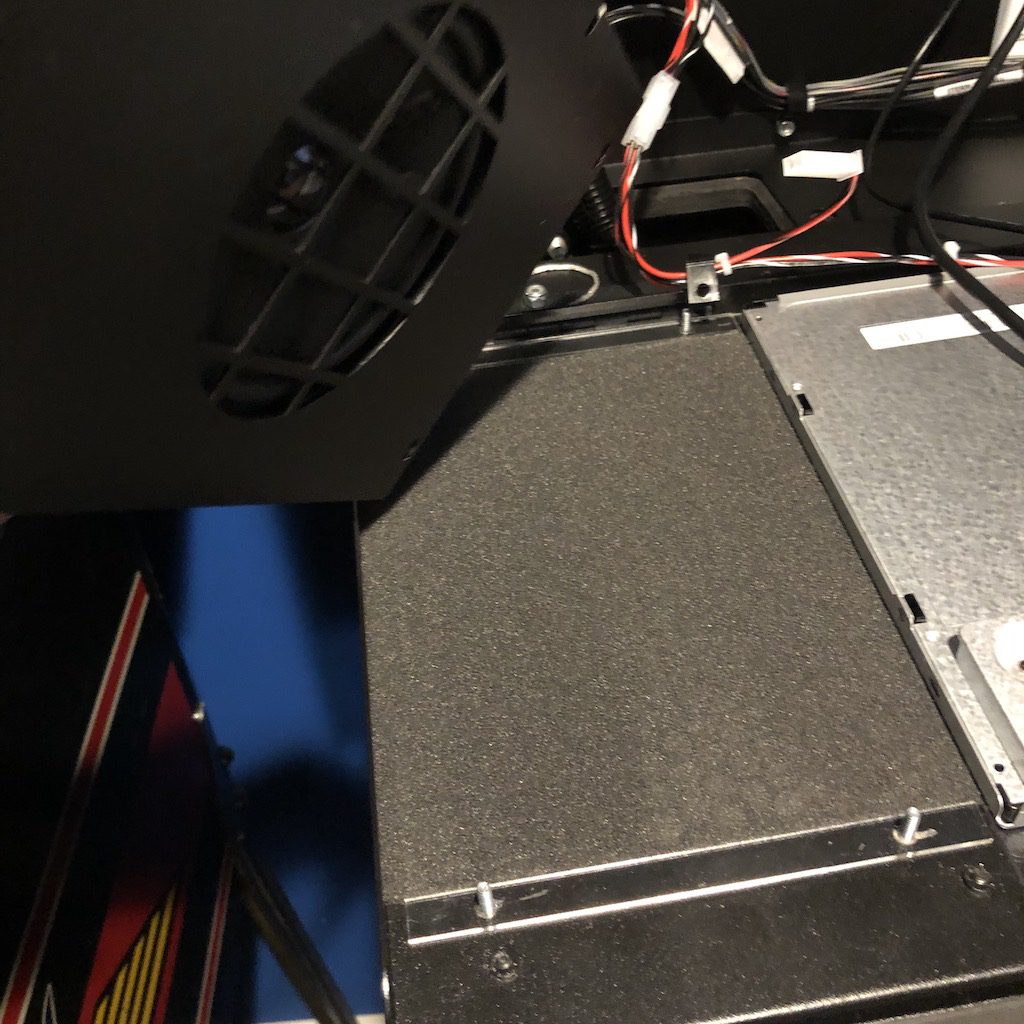
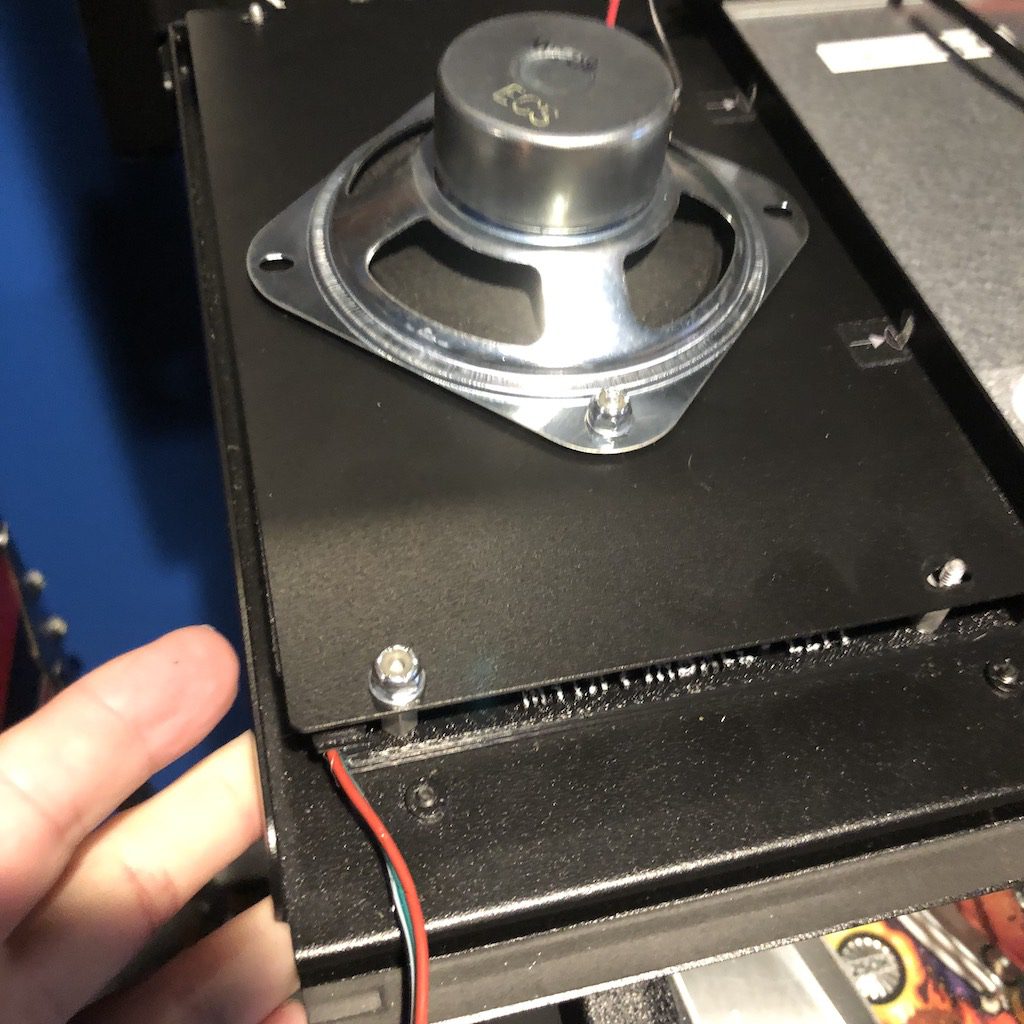
Open the speaker panel by inserting the back-box key and turning it. Lower the speaker panel down into the position shown above.
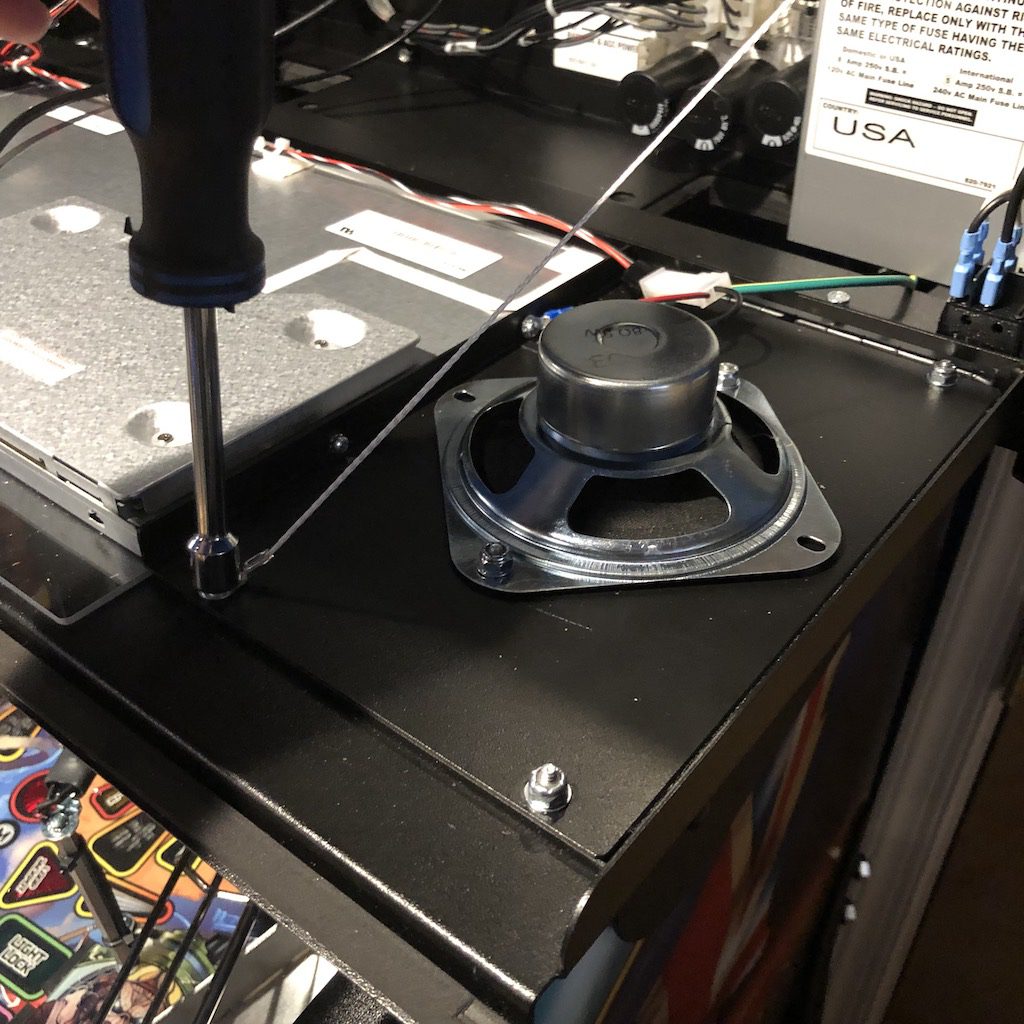
Locate the nut with the string attached. Using the 5/16″ nut driver, remove the nut and washer. You may need to lift up on the speaker panel slightly while removing. Move the string out of the way and store the nut and washer for future use.
Remove the small screws that hold the display in. Be sure to apply a decent force to not strip the screws out. Move the ground wire out of the way. Put the small screws in a bag, as they will not be reused.
Note: The screen will now be loose on this side, do not tilt up the back-box door or remove the other side screws until this side is re-secured.
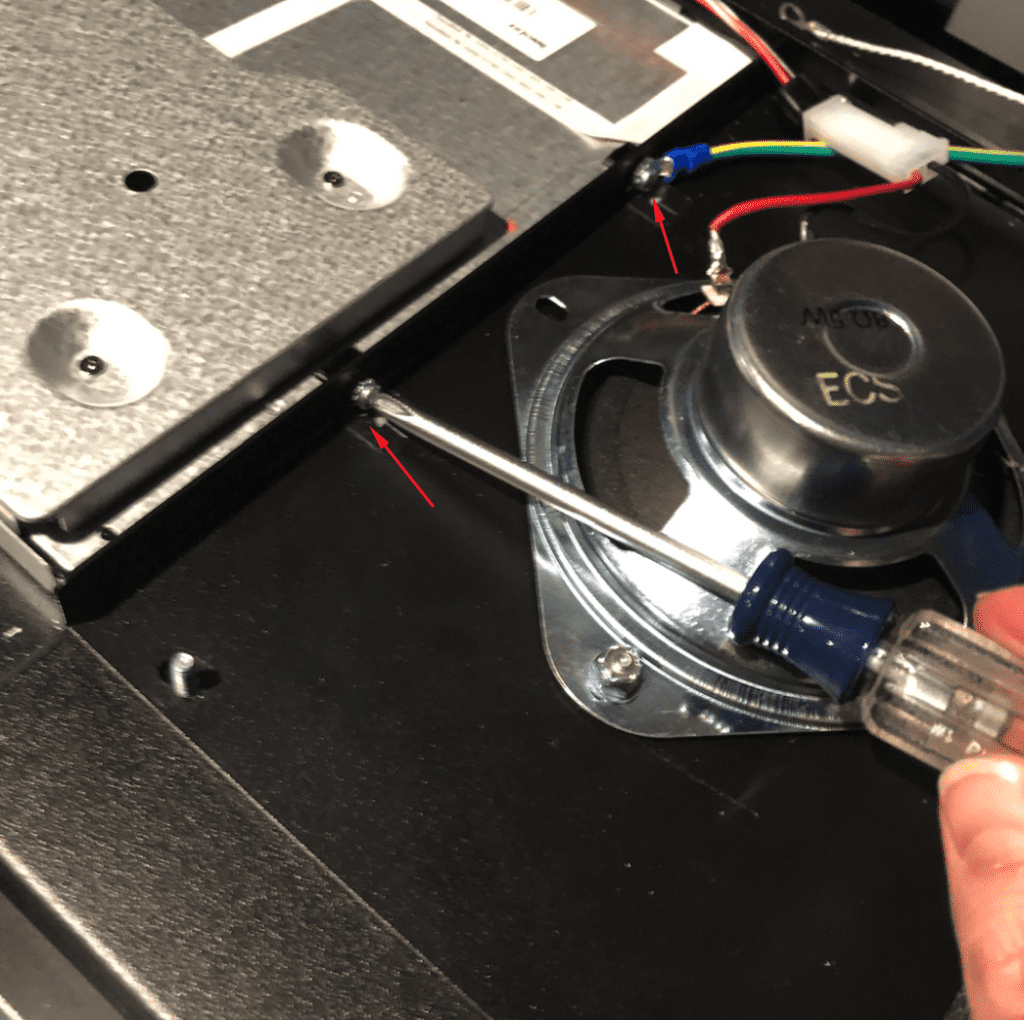
Remove the remaining 3 bolts and washers from the speaker plate and set aside for future use.
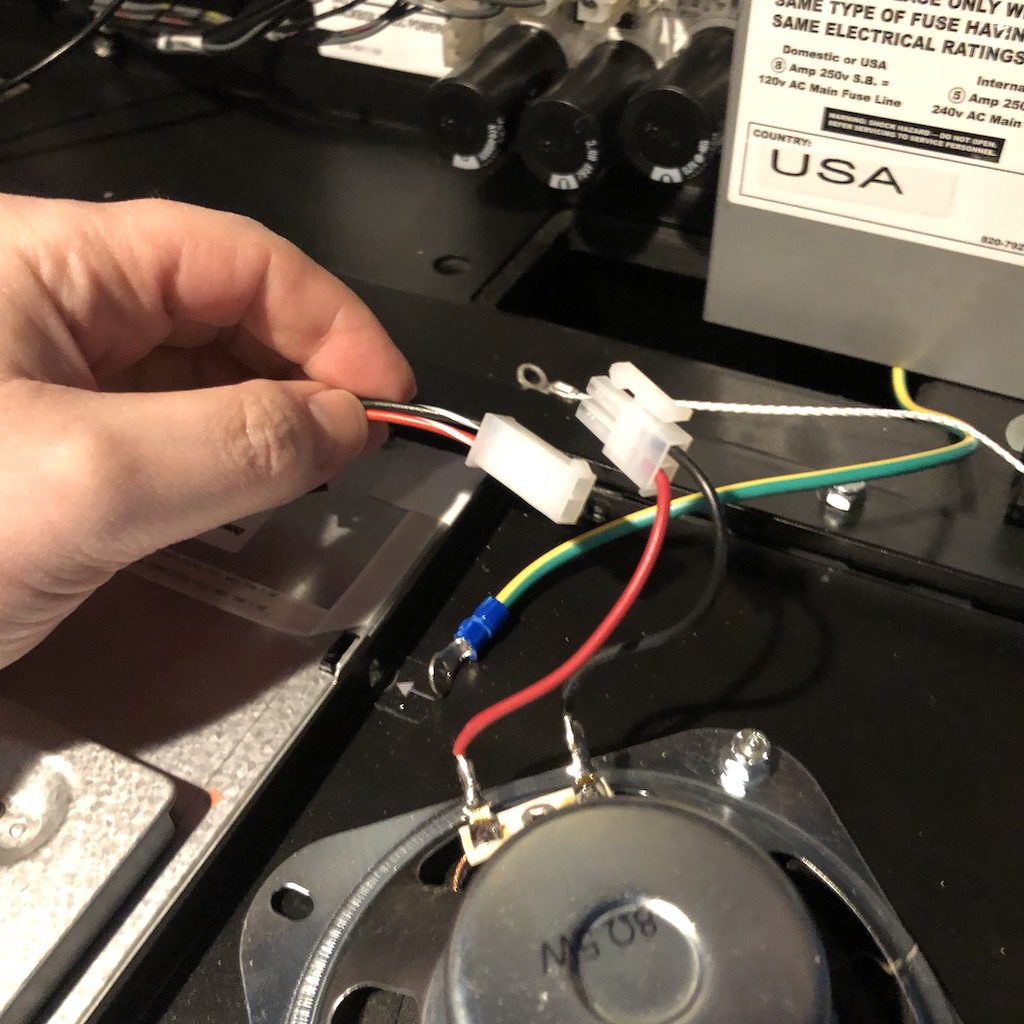
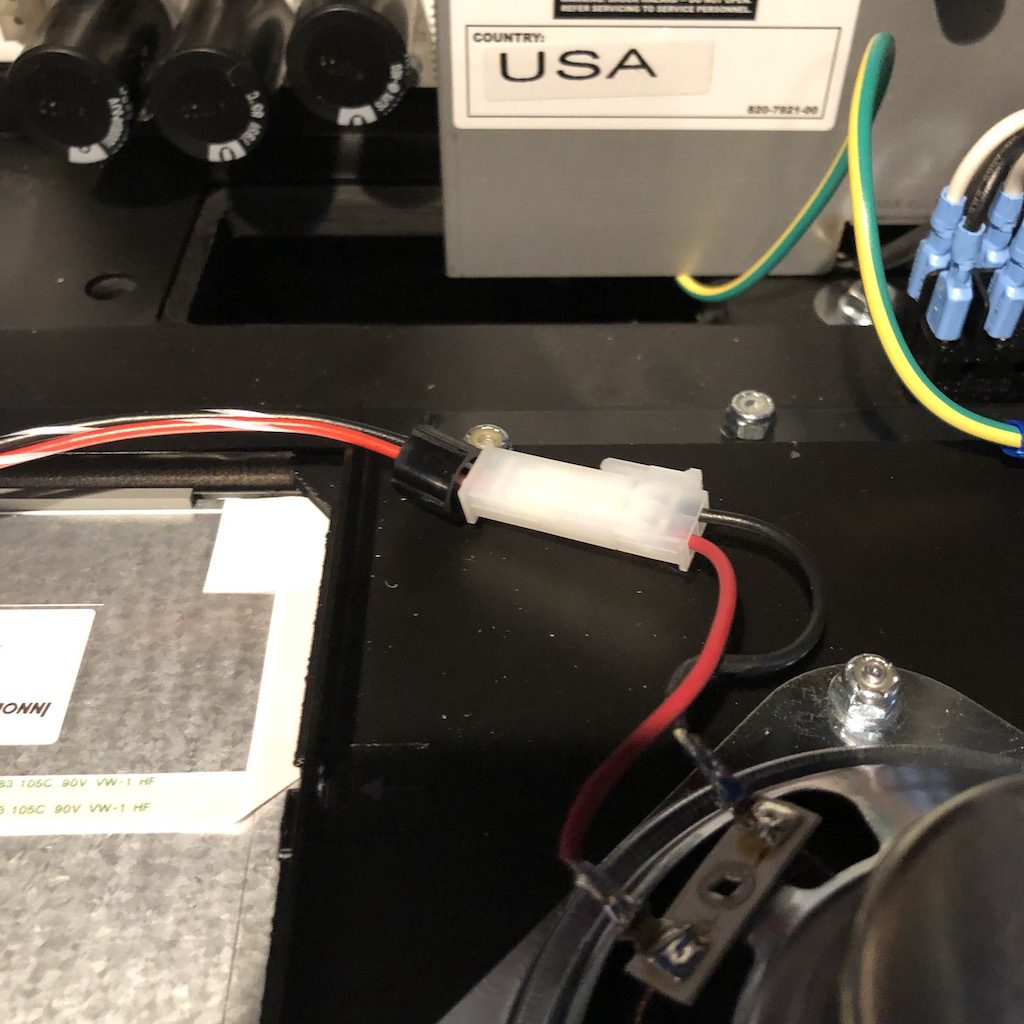
Unplug the speaker connection by pressing on the tab and pulling the connector apart.
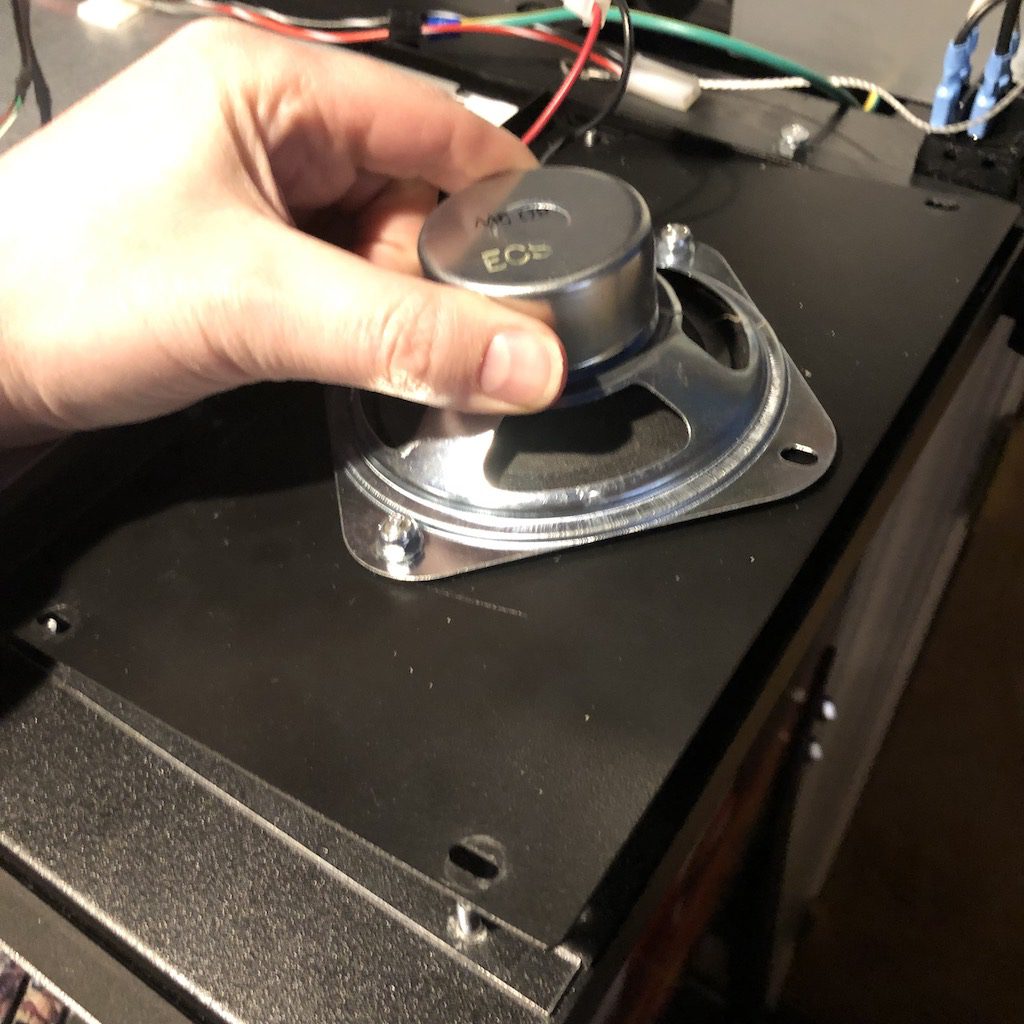
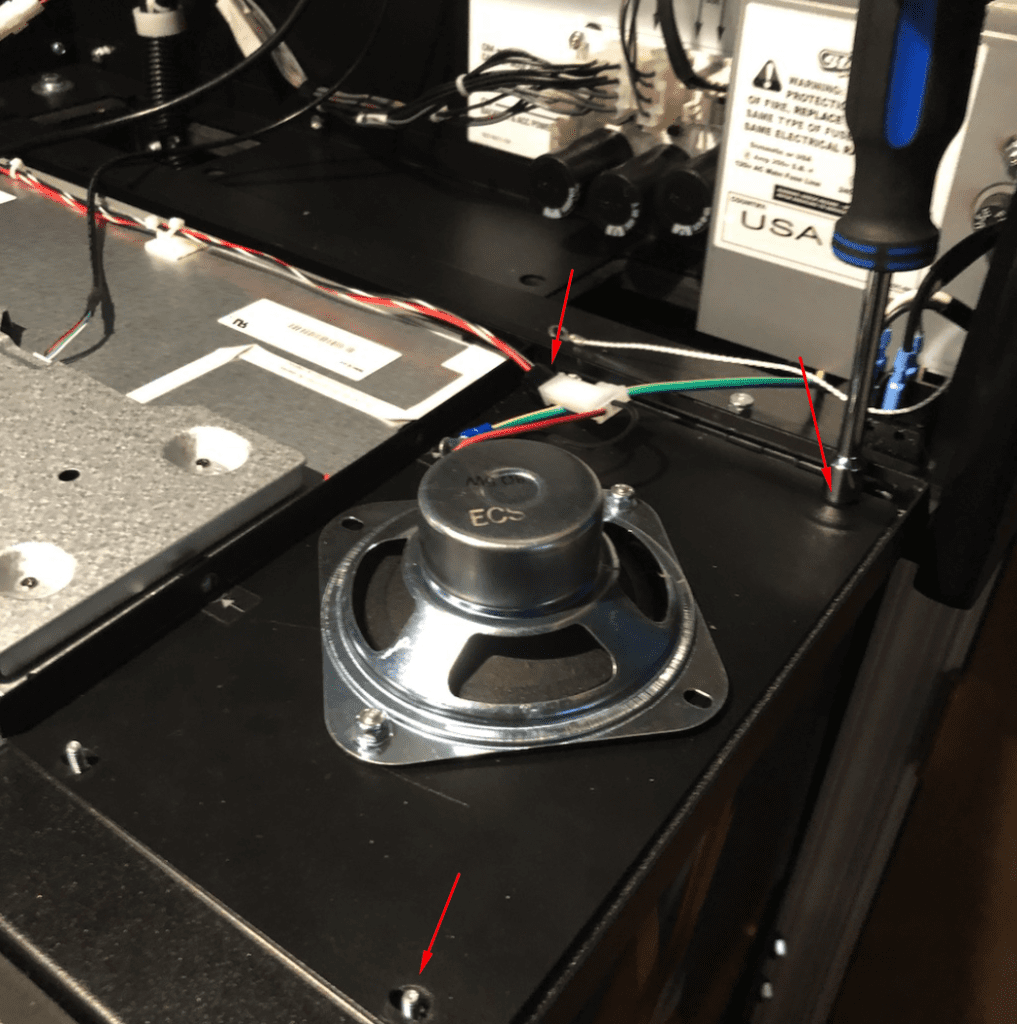
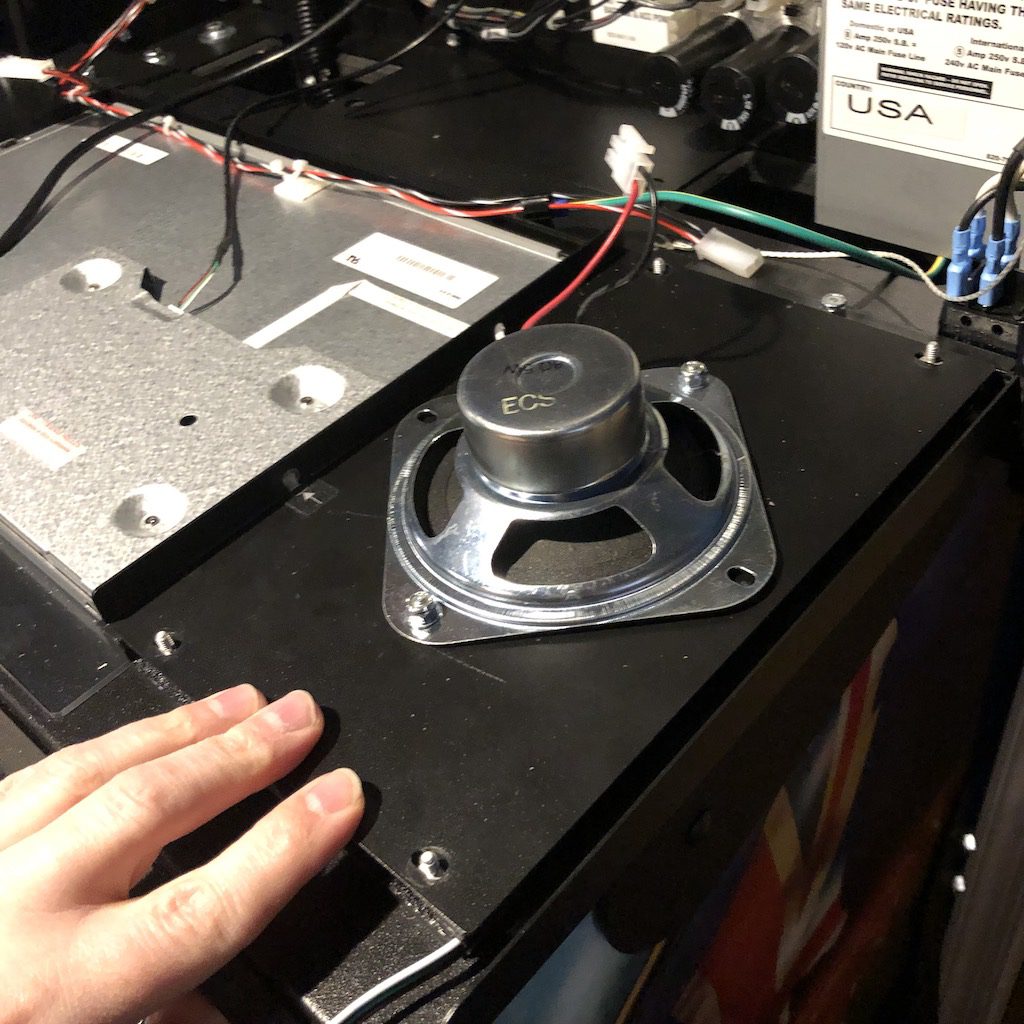
Remove the speaker panel by lifting straight up on the speaker itself. Place the speaker panel carefully aside.
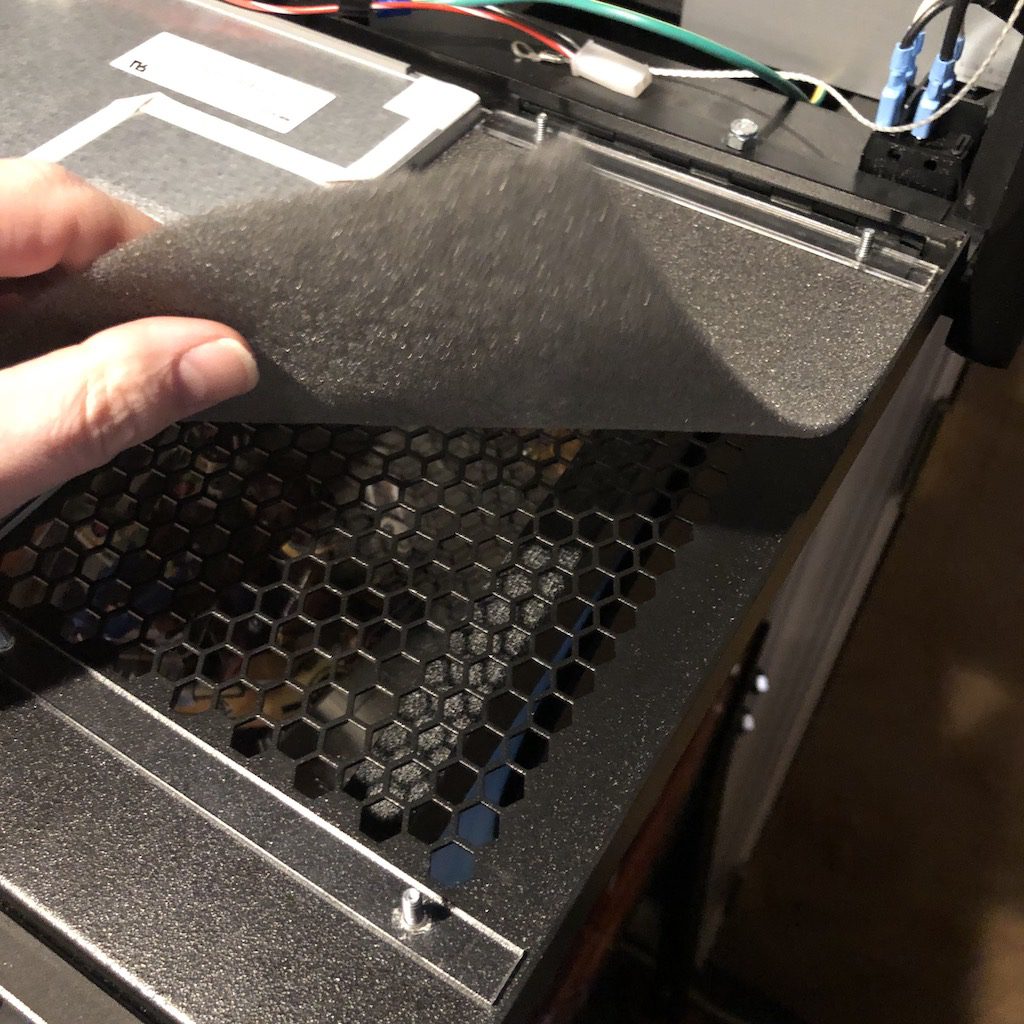
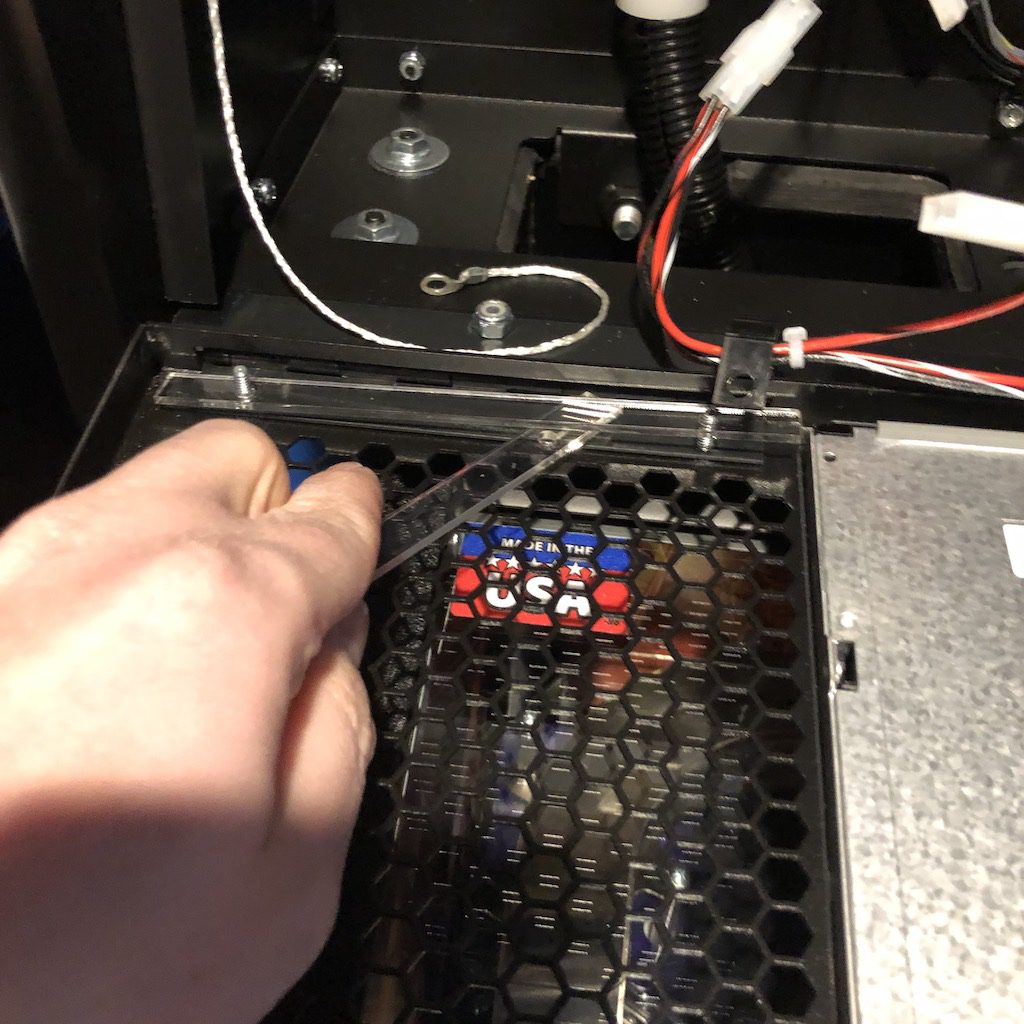
Remove the speaker foam and gently set aside.
Remove BOTH plastic spacers (top and bottom) and set them aside. You can use the first plastic spacer as a pry bar to remove the back plastic spacer as it can be difficult to remove. Put the plastic spacers in a bag as they will not be reused.
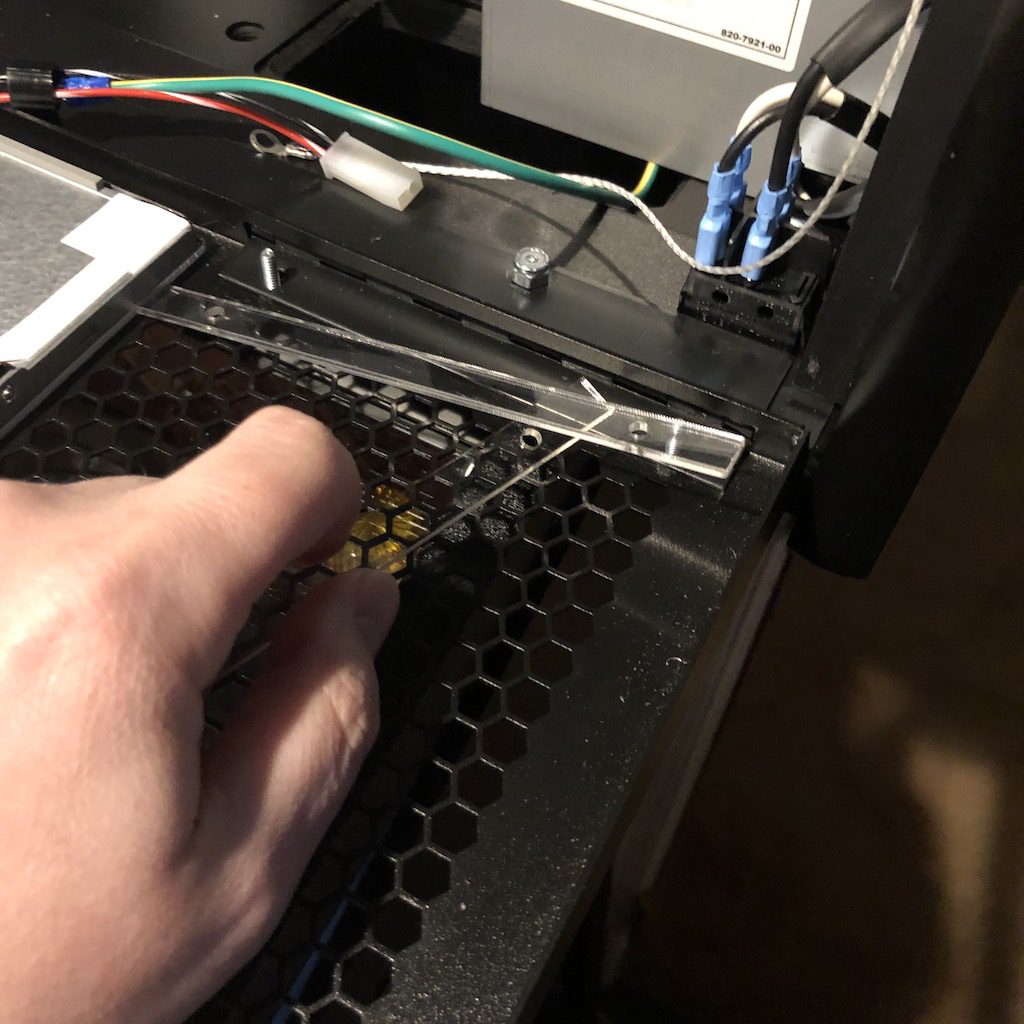
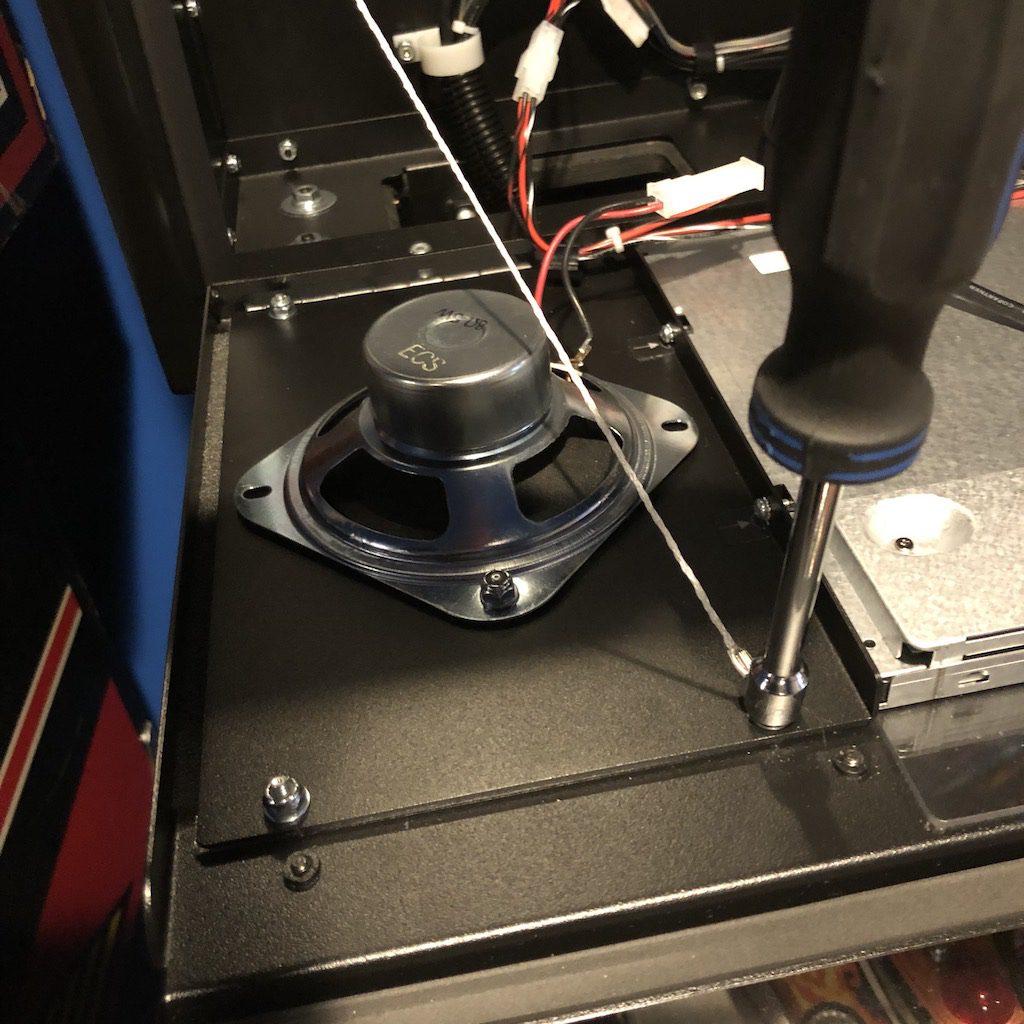
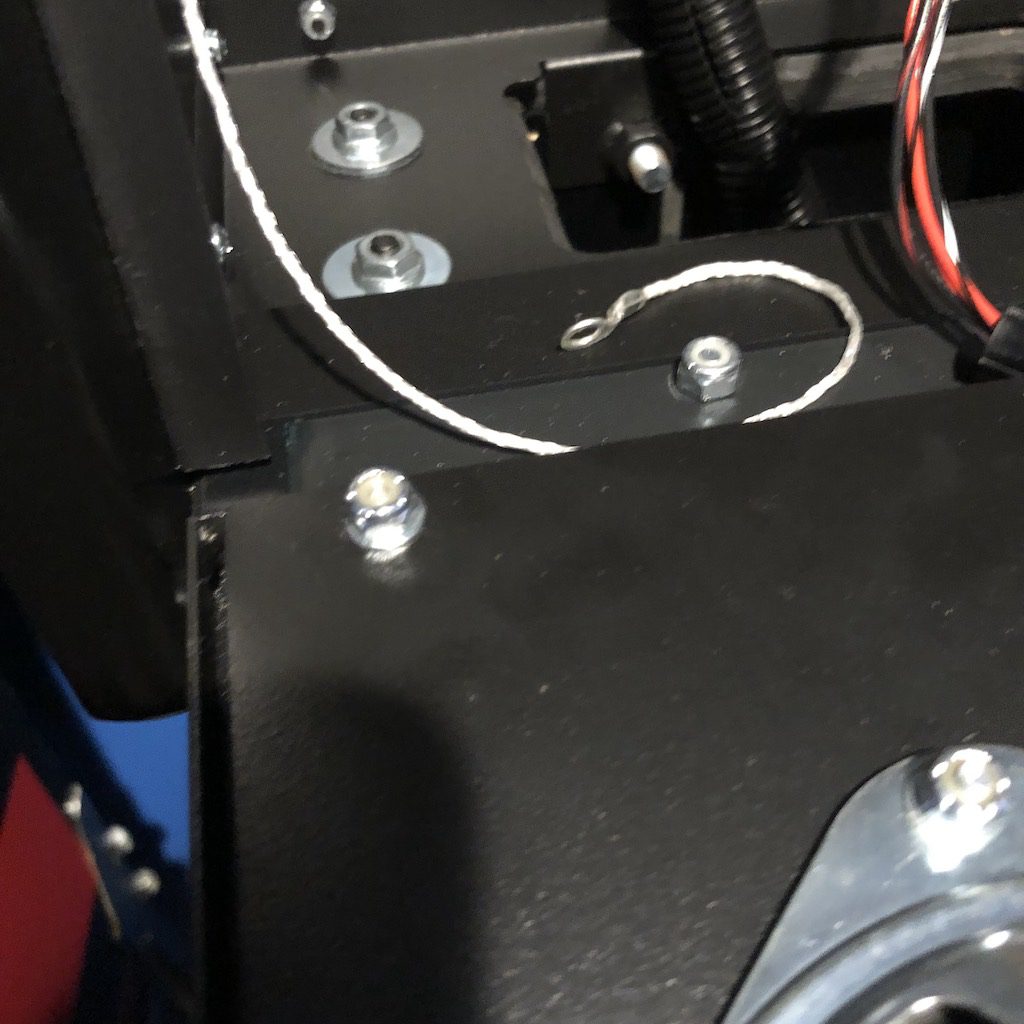
Check the nut in the back of the speaker frame. Make sure that the studs are aligned straight with the hinge as shown above. If not tighten or loose the nut to make sure it is aligned. Check BOTH sides at this time.
Step 2 – Install Right Side Light Frame
Recommended: Install the Foam In Front of the LED Light Frame
Note: You can choose to re-install the speaker foam on the front of the speaker frame or the back of the speaker frame. If you install the foam on the front it will provide a more diffused look to the lights, if you put it on the back it will provide a more direct lighting effect.
If you wish to install the foam in the front of the speaker frames, place the foam back down now and line it up between the posts.
If you want to put the speaker foam behind the light frame, then skip this step now.
Continue Install…
Note: If you have custom speaker inserts, they should be installed before the frame is installed in the game. See the install instructions for your particular speaker inserts before continuing.
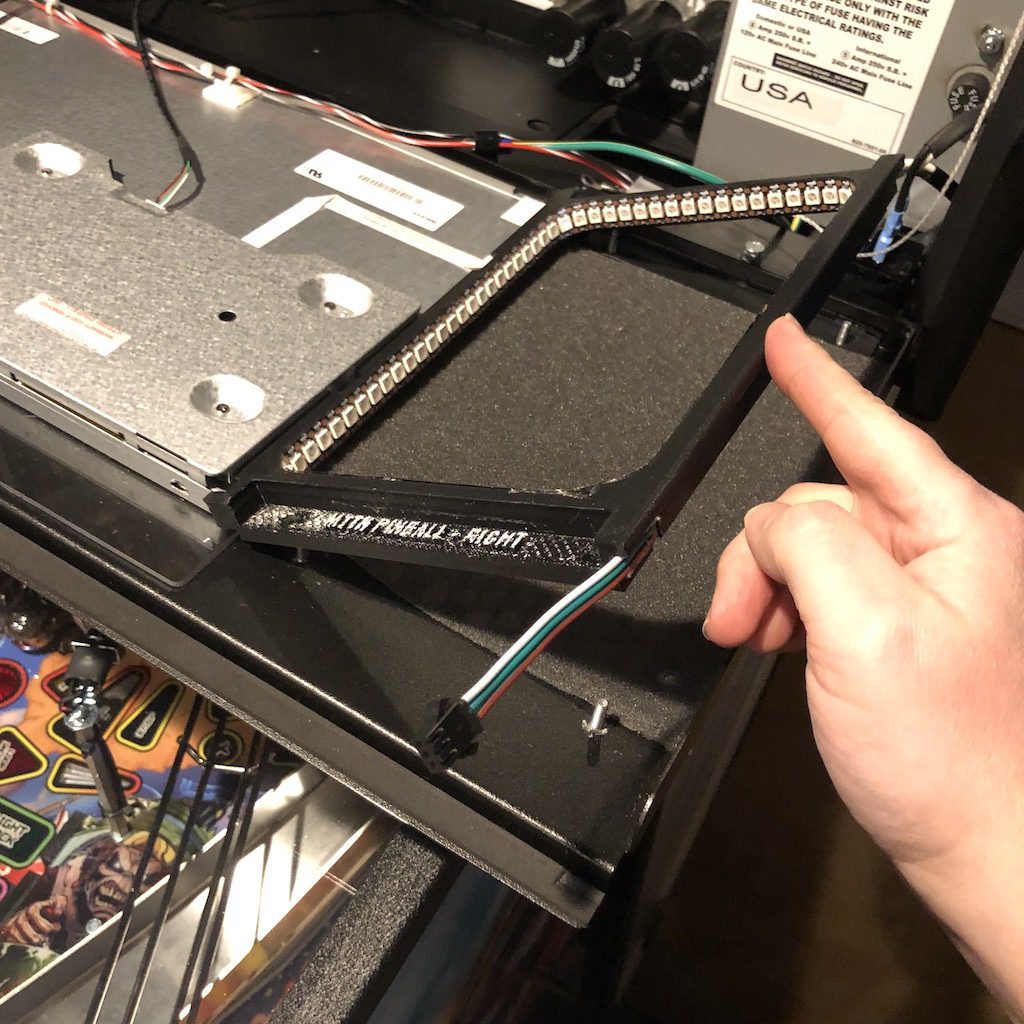
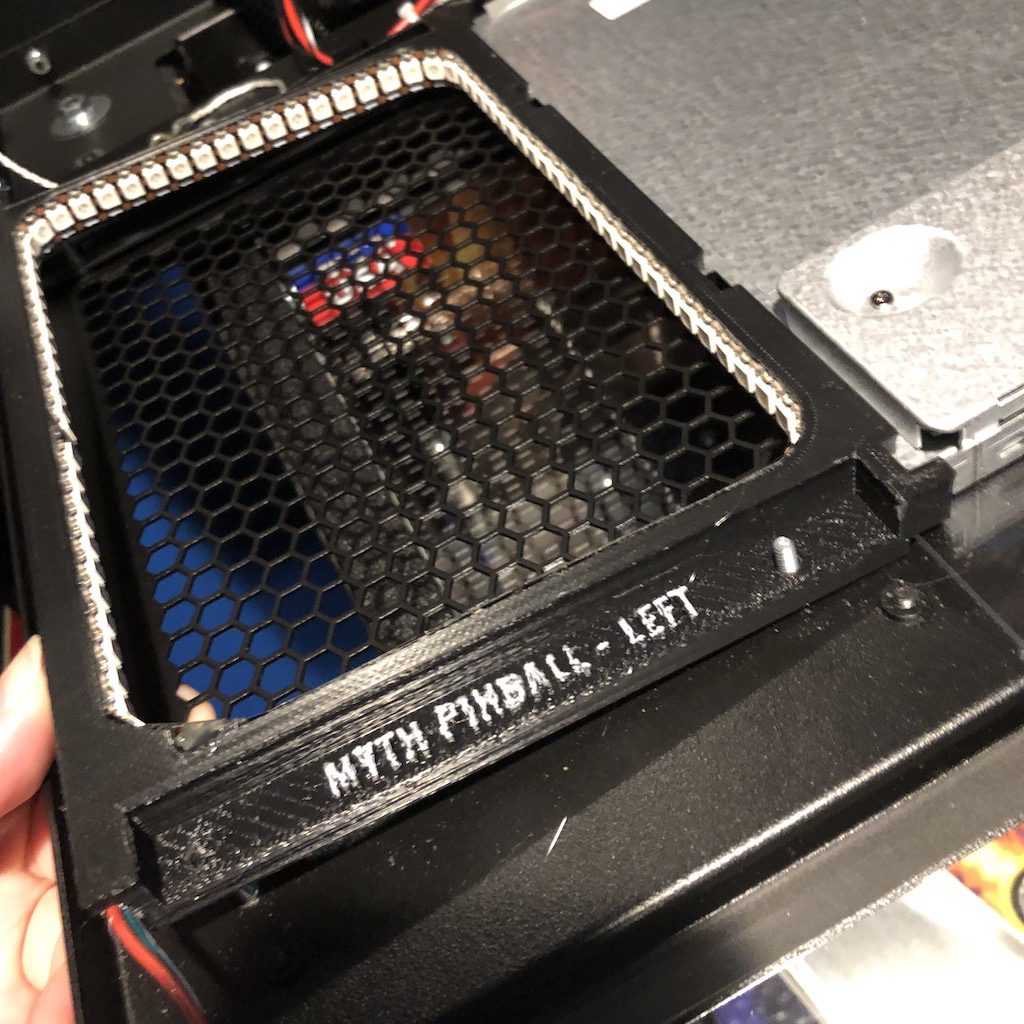
The frames have a tight fit. Start by lining up the LCD panel with both corners of the light frame. Work the light frame down to the metal studs. You may need to lift up on the metal panel slightly to help un-warp it. If the frame does not appear to go down, lift it back up, check both corners again and re-seat.

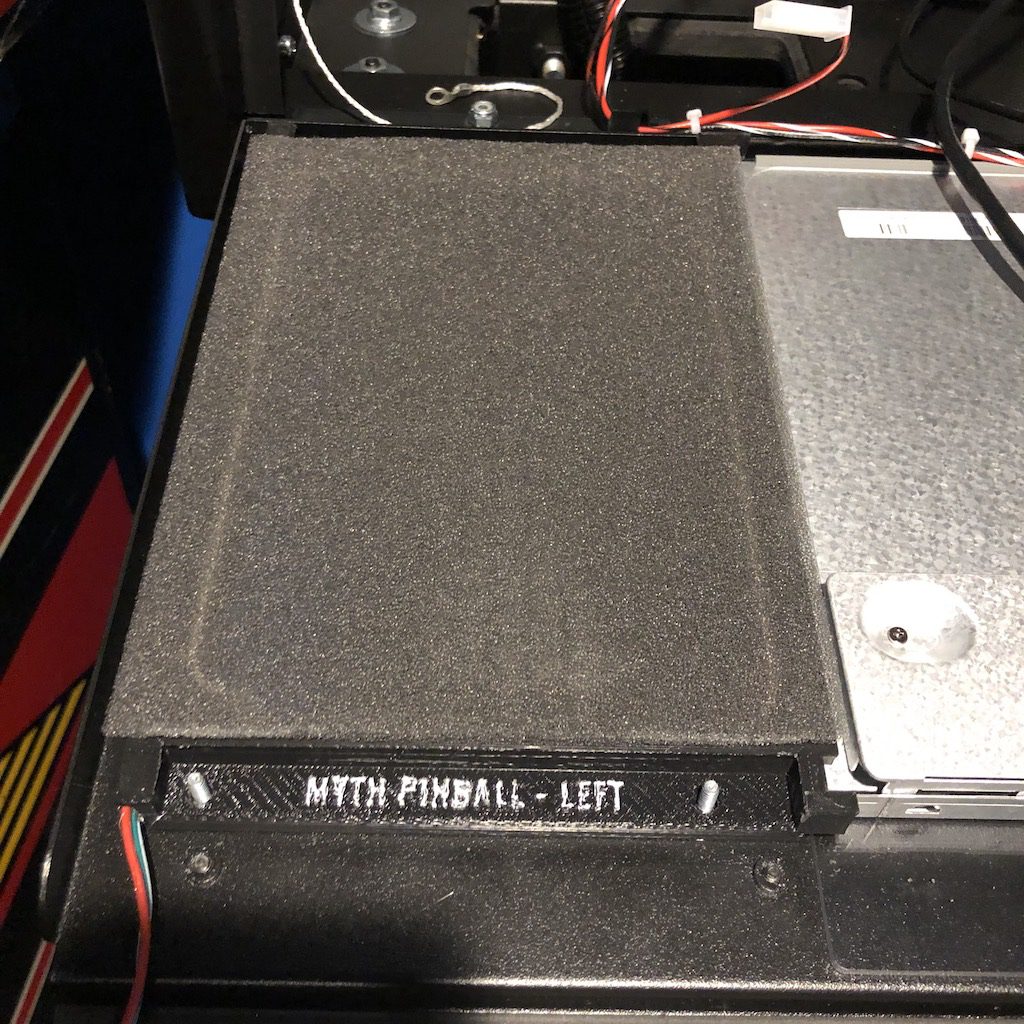
Once installed the frame should look like the above and be completely flush with the metal panel.
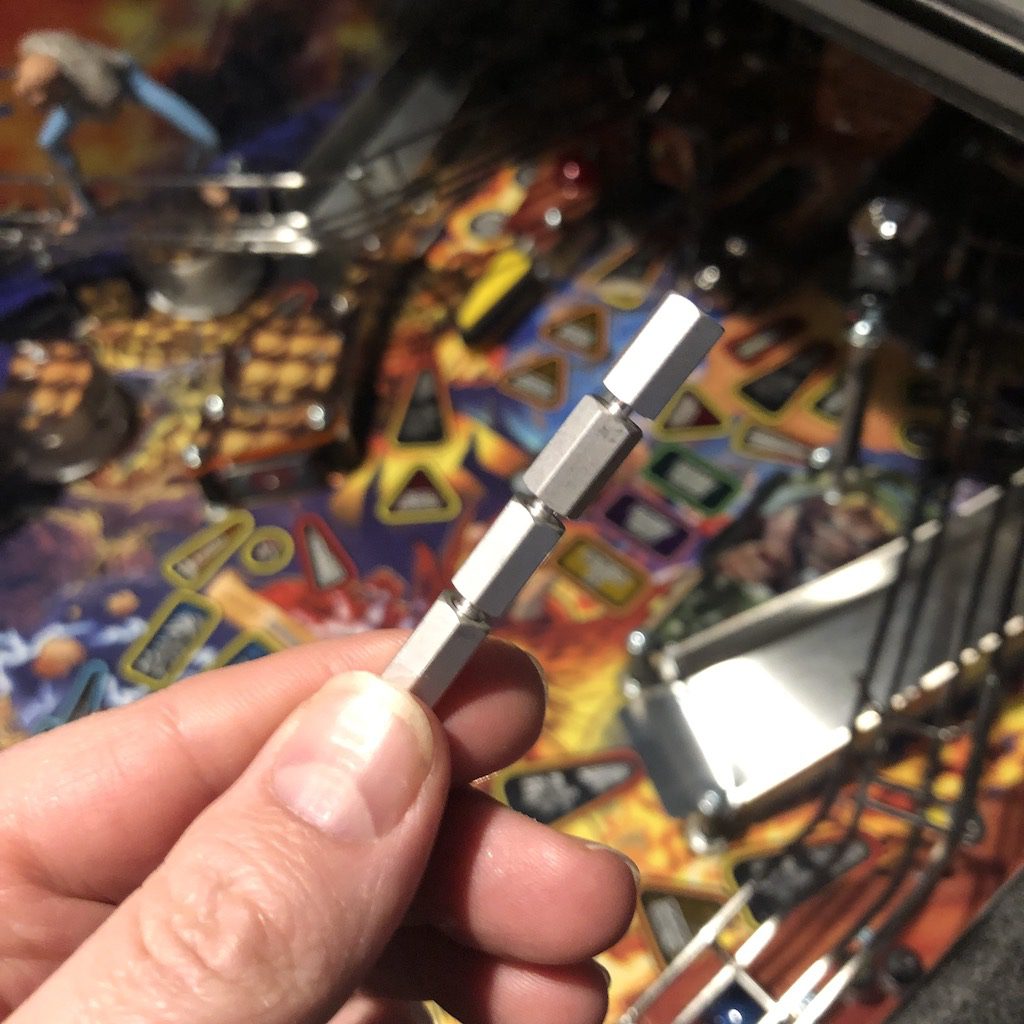
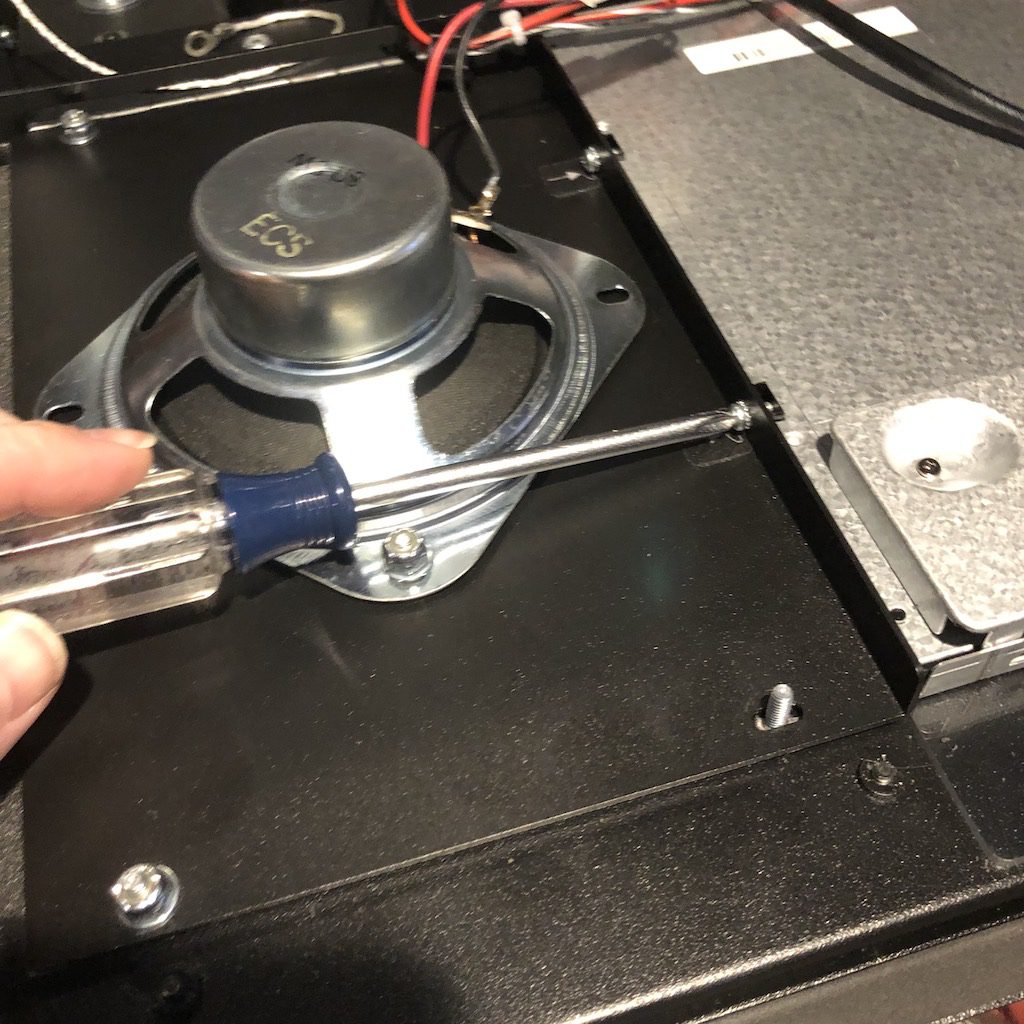
Take one of the standoff metal towers and separate it into four individual standoffs.
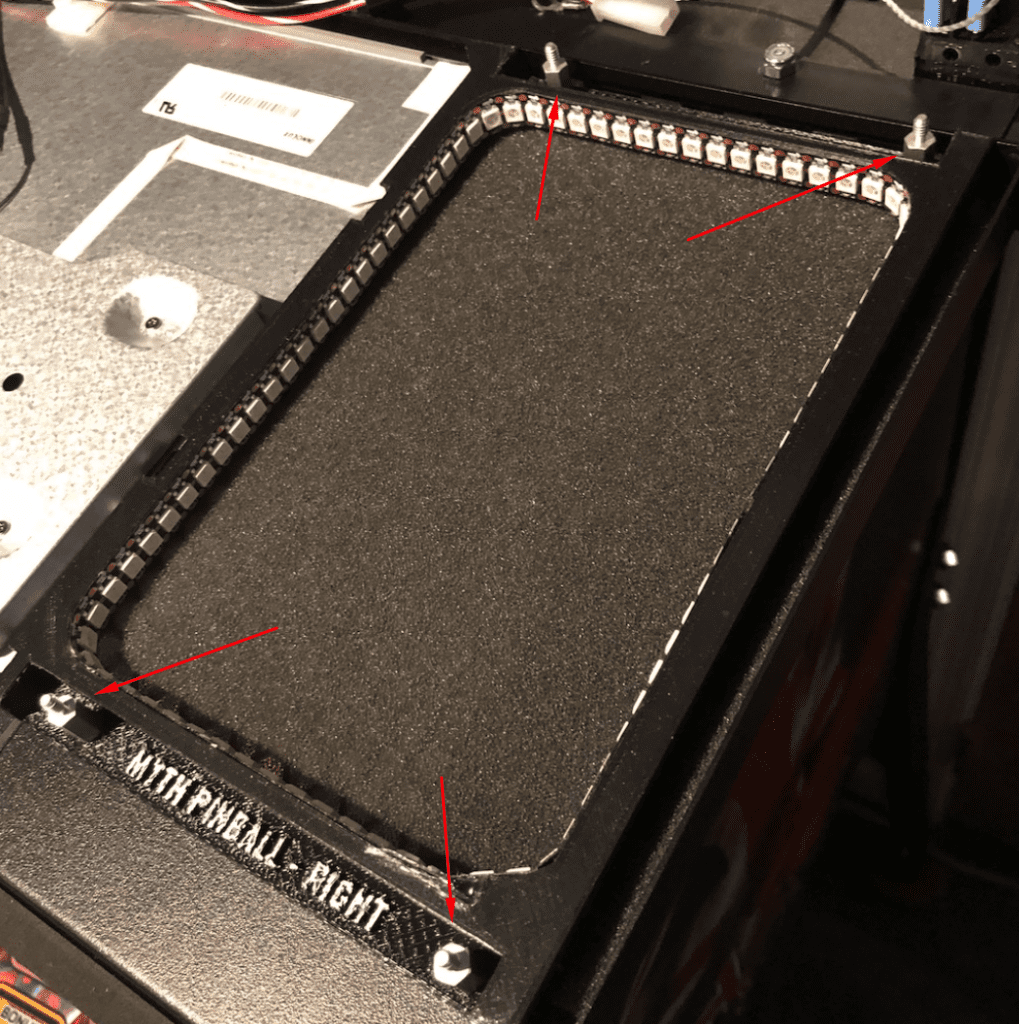
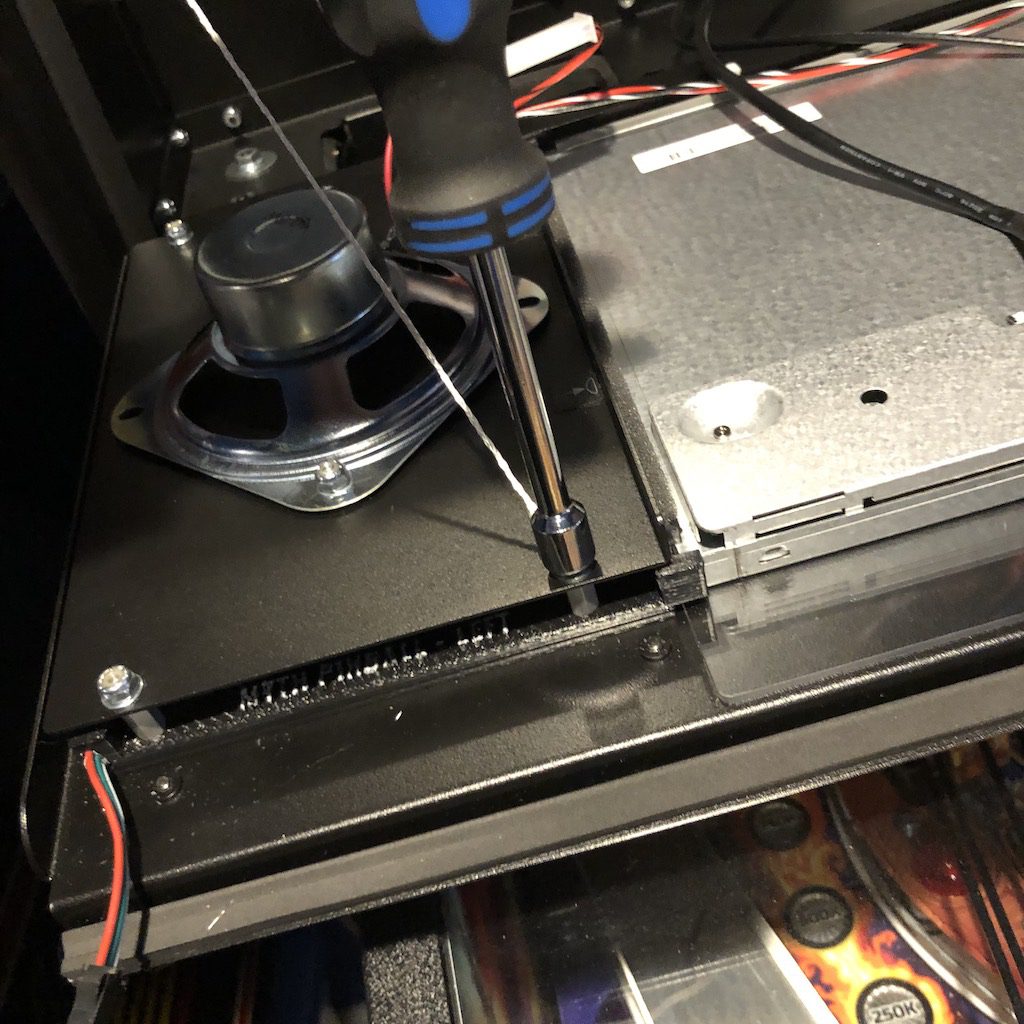
Install the standoffs and tighten loosely by hand on all four metal posts. Do not tighten yet.
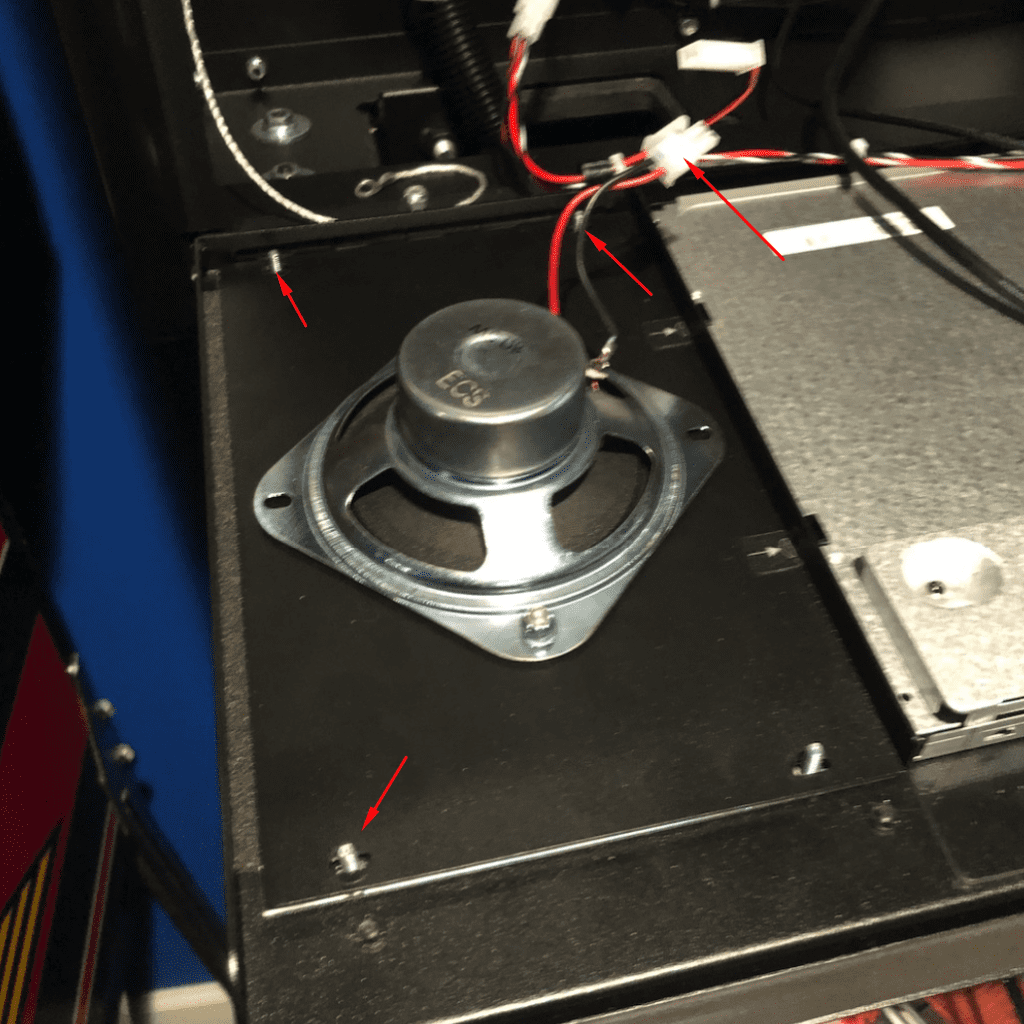
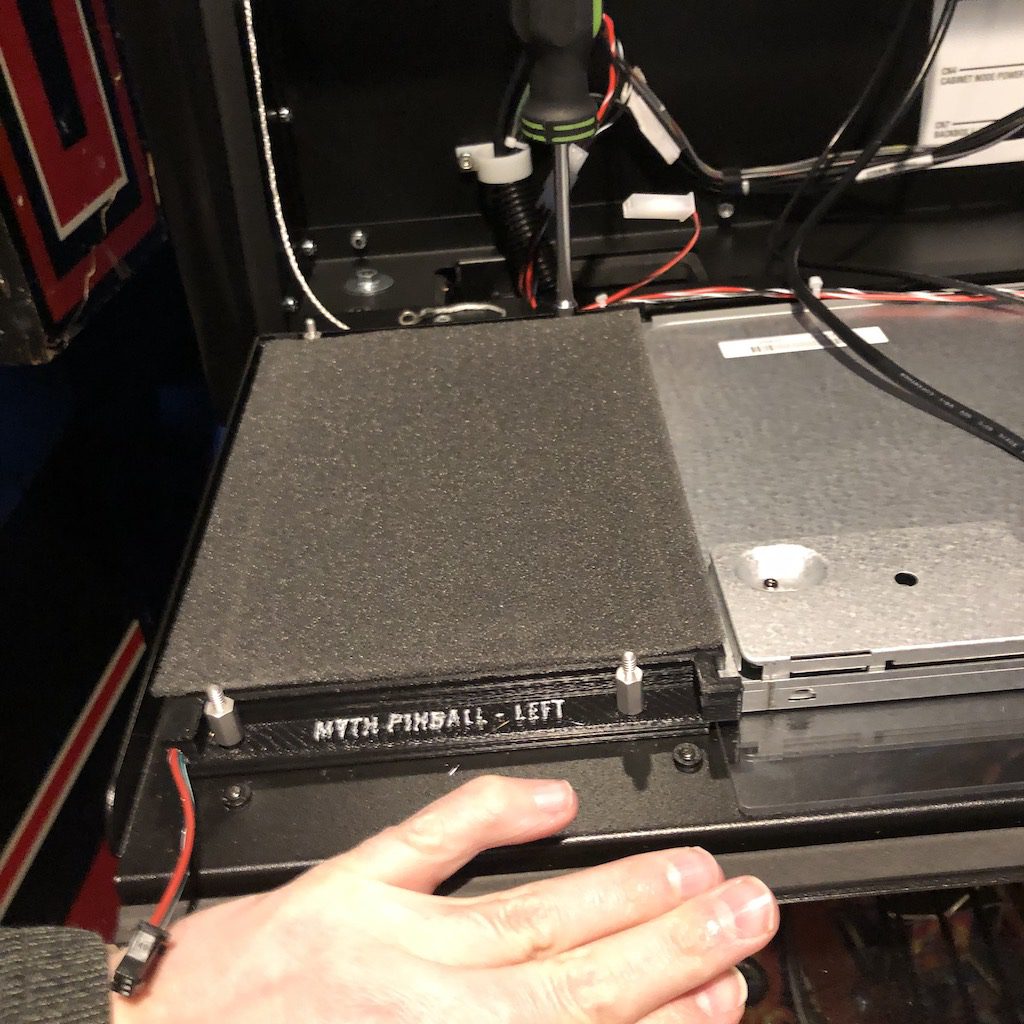
Use your hand to push the speaker panel back towards the game. At the same time use your 1/4″ nut driver to tighten the back two standoffs.
DO NOT OVER-TIGHTEN, you will crack the frames and this is not covered under warranty.
To confirm the panel is tight enough, make sure the metal speaker panel does not move forward and backwards anymore. You can then go ahead and tighten the front two standoffs.
Optional: Install Foam Behind LED Lights
If you want to install the speaker foam BEHIND the led lights, you can re-install it now on top of the speaker frame.
If you have already installed the foam you can skip this step.
If installing the speaker foam behind the lights in the frame: you can install like seen above in the reference image, make sure you cover all the edges.
Install Optional Light Distribution Panels
If you have purchased the light distribution panels:
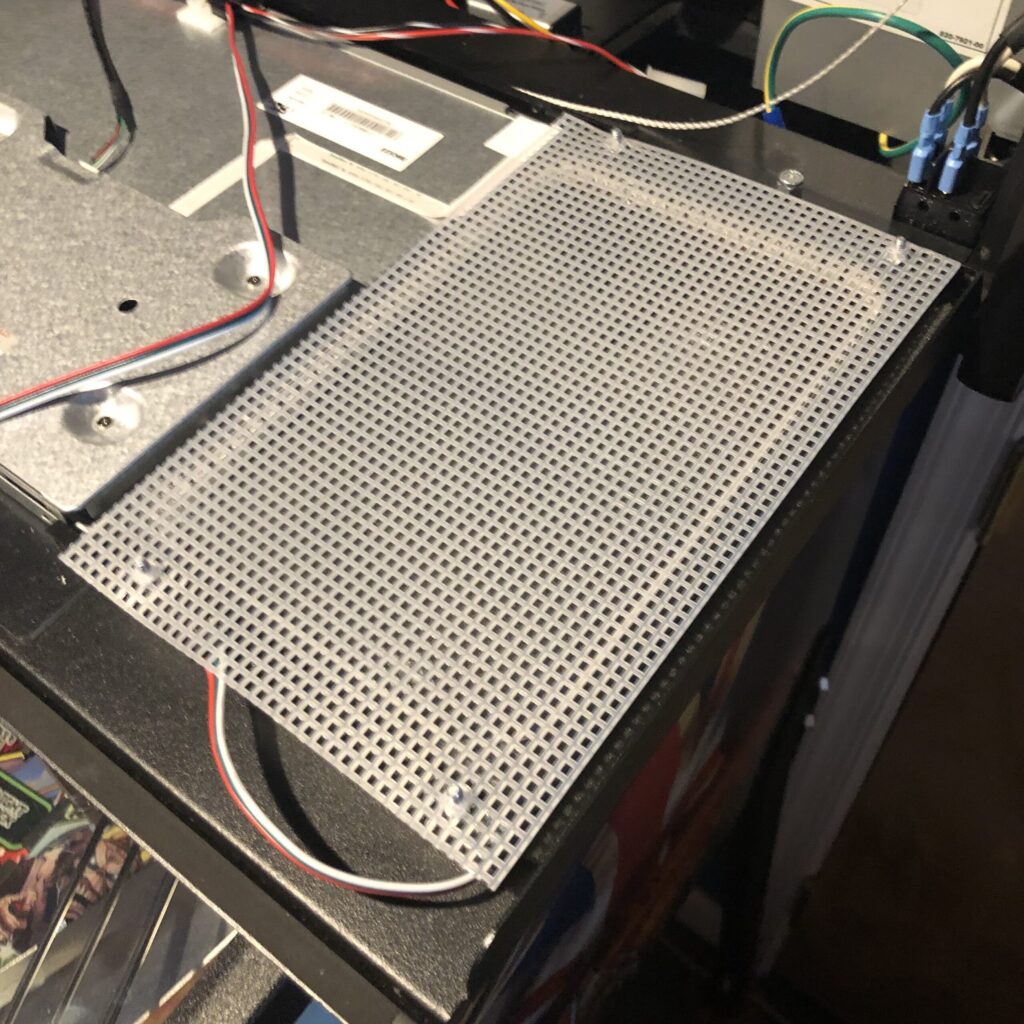
Install the light distribution panels by pressing them into the aluminum standoffs. You should stretch them slightly to the next hole so they are tight.
On the side towards the head, they should be in about two squares, and from the right side, they should be in about 4 squares. Be sure the light distribution panels do not overlap any of the black metal edges or the back-box door will not close. Once lined up correctly push on tightly.
Continue Install…
Re-install the speaker frame back onto the metal studs… Each stud has to be installed in a certain way, so follow the next instructions carefully.
Install the washer and nut on the front right stand-off. Tighten slightly.
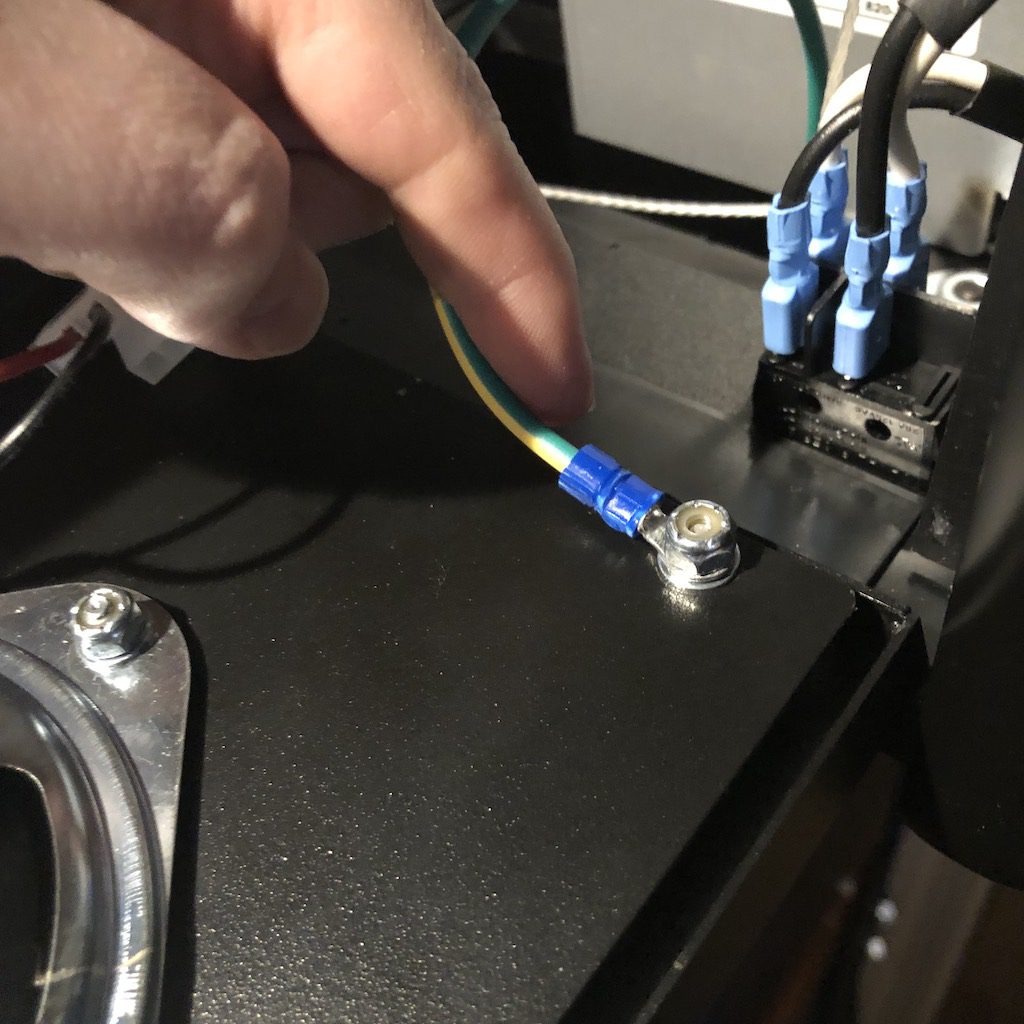
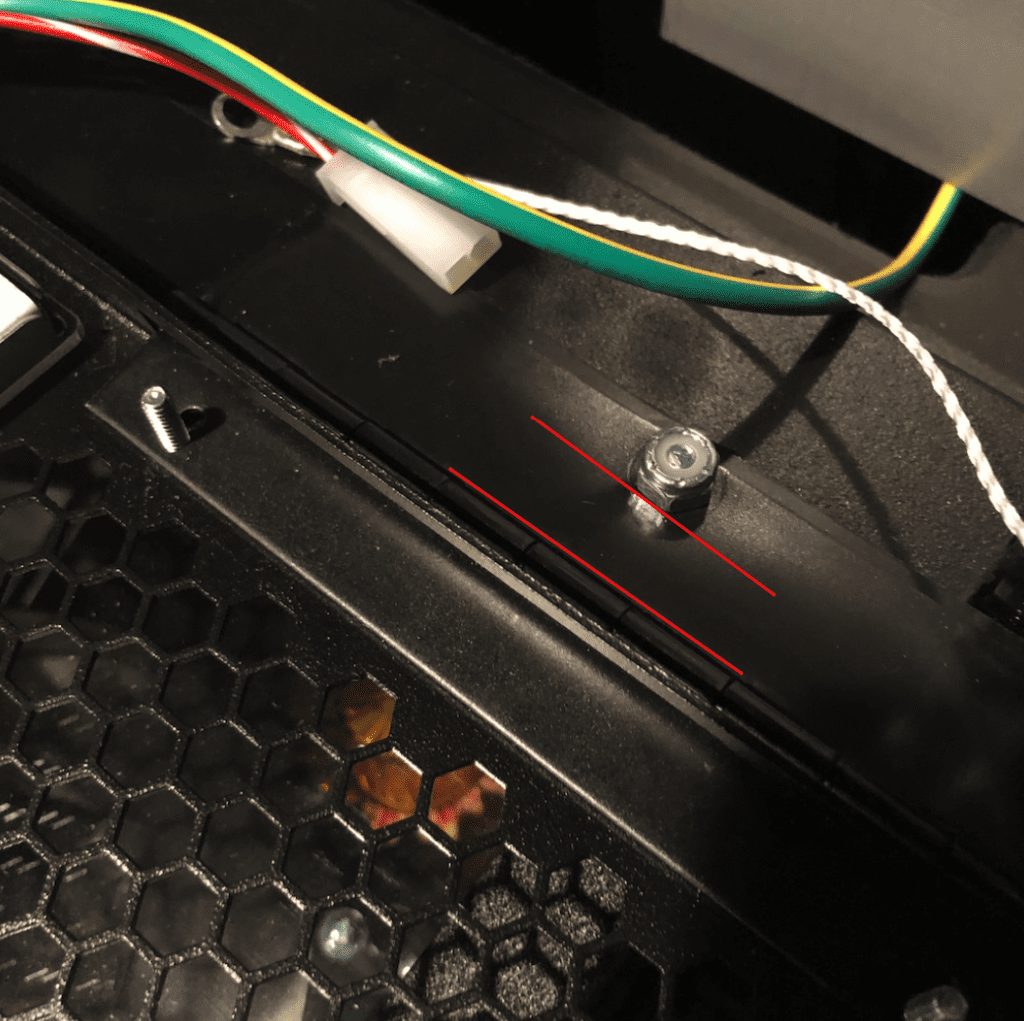
Install the washer and then the ground wire and nut on the back right stand-off. Tighten slightly. When this nut is fully tightened make sure the ground wire is in the orientation shown above.
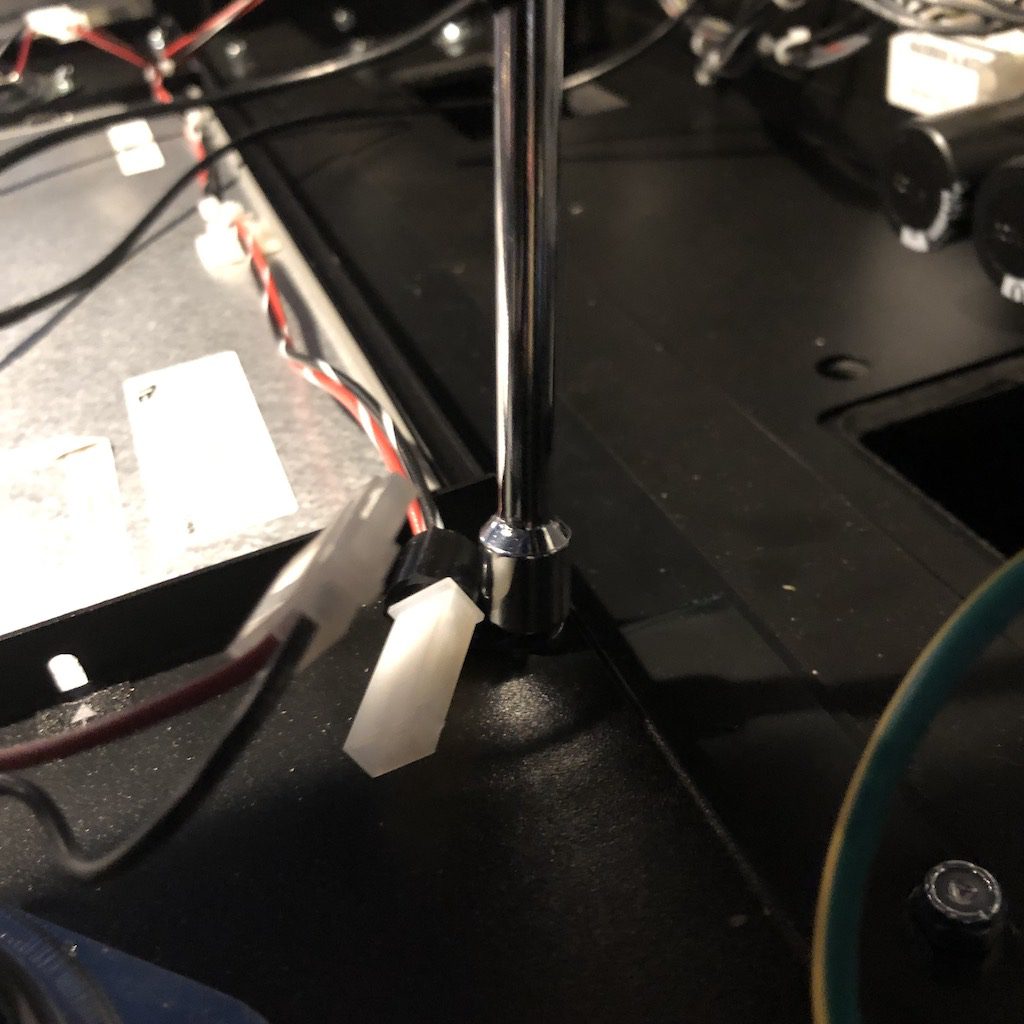
Install the washer, then the wire clip and nut on the back left stand-off. Tighten slightly.
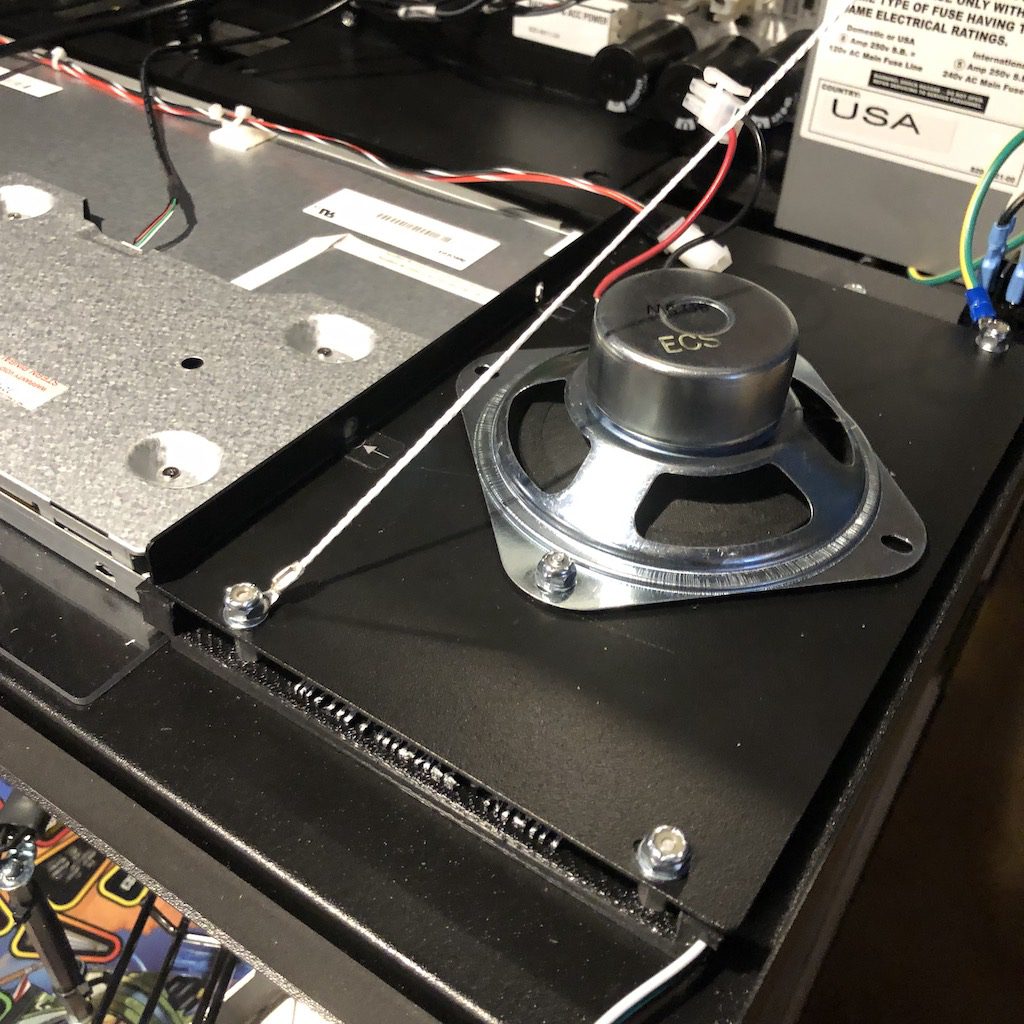
Re-Install the washer, string and nut on the top left stand-off. You may need to lift the frame slightly to install this nut.
Now go ahead and tighten all 4 corners. These do not need to be super tight! If you are having any problems installing the nuts you can remove the washers, they are not required.
DO NOT OVER TIGHTEN, this will snap the stand-off posts!!!!!
Reconnect the speaker connection on this side.
Step 3 – Prepare Left Side Light Frame
Remove left side front right nut and store for future use.
Remove the small screws that hold the display in. Be sure to apply a decent force to not strip the screws out. Move the ground wire out of the way. Put the small screws in a bag, as they will not be reused.
Note: The screen will now be loose on this side, do not tilt up the back-box door until this side is re-secured.
Remove the remaining three washers and nuts and set aside for future use.
Disconnect the speaker connection by pushing the tab and pulling the connector apart.
Remove the speaker panel and speaker foam and set aside for future use.
Remove the two acrylic spacers and set aside. You can use the first plastic spacer as a pry bar to remove the back plastic spacer as it can be difficult to remove. Put the plastic spacers in a bag as they will not be re-used.
Step 4 – Install Left Speaker Frame
Optional: Install the Foam In Front of the LED Light Frame
Note: You can choose to re-install the speaker foam on the front of the speaker frame or the back of the speaker frame. If you install the foam on the front it will provide a more diffused look to the lights, if you put it on the back it will provide a more direct lighting effect.
If you wish to install the foam in the front of the speaker frames, place the foam back down now and line it up between the posts.
If you want to put the speaker foam behind the light frame, then skip this step now.
Continue Install…
The frames have a tight fit. Start by lining up the LCD panel with both corners of the light frame. Work the light frame down to the metal studs. You may need to lift up on the metal panel slightly to help un-warp it. If the frame does not appear to go down, lift it back up, check both corners again and re-seat.
Install the metal stand-offs on all four corners using your 1/4″ nut driver. Press the speaker frame towards the back-box and tighten the metal stand-offs. DO NOT OVER-TIGHTEN, you will crack the frames and this is not covered under warranty.
To confirm the panel is tight enough, make sure the metal speaker panel does not move forward and backwards anymore. You can then go ahead and tighten the front two standoffs.
Optional: If you want to install the foam on top of the speaker panel, install it now as shown above.
Install Optional Light Distribution Panels
If you have purchased the light distribution panels:
Install the light distribution panels by pressing them into the aluminum standoffs. You should stretch them slightly to the next hole so they are tight.
On the side towards the head, they should be in about two squares, and from the left side, they should be in about 4 squares. Be sure the light distribution panels do not overlap any of the black metal edges or the back-box door will not close. Once lined up correctly push on tightly.
Continue Install…
Install the speaker panel back onto the metal stand-offs. Install the washer and nut on the left front stand-off and hand tighten.
Install the washer and nut in the back left corner and tighten slightly.
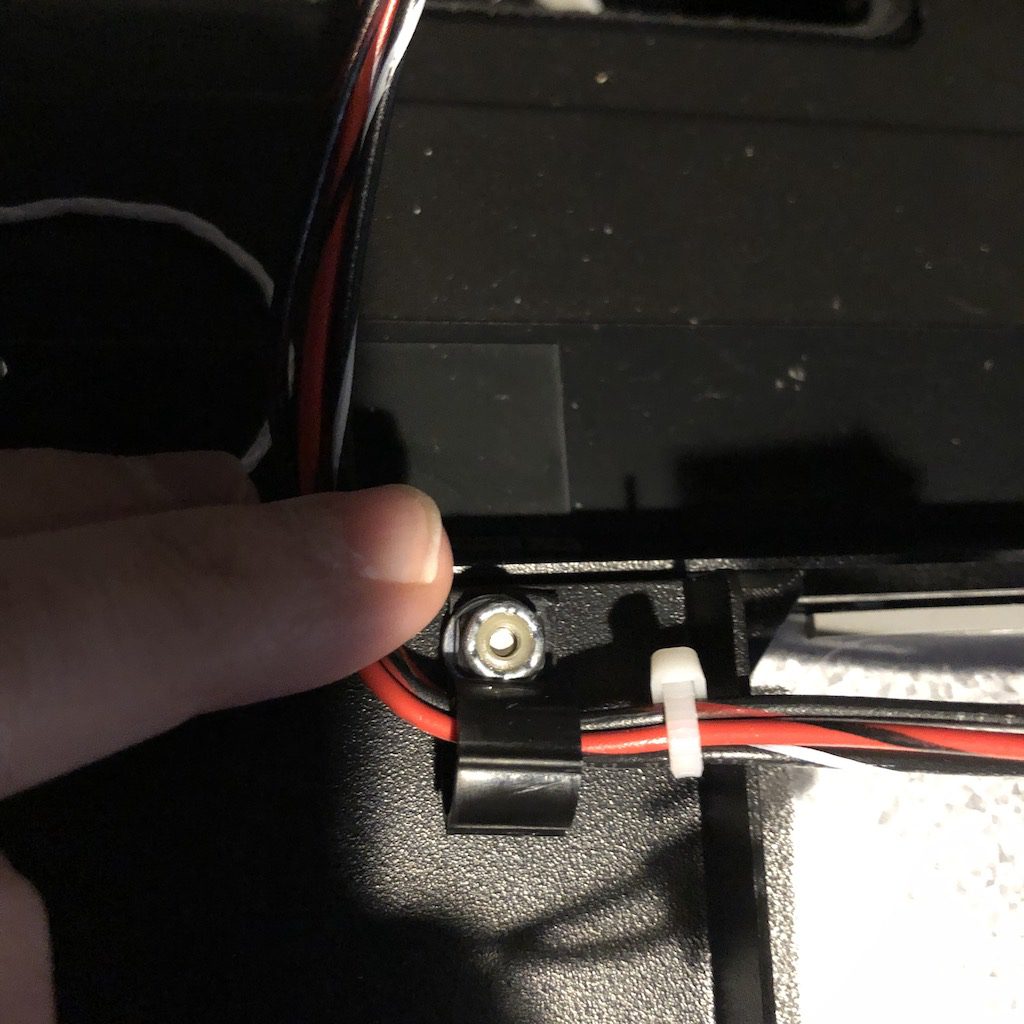
Install the washer, wire clip and nut in the back right corner and tighten slightly.
Install the washer, string and washer and nut on the front right corner. Tighten slightly. You may need to lift up on the speaker panel slightly to install this nut.
Now go ahead and tighten all 4 corners. These do not need to be super tight! If you are having any problems installing the nuts you can remove the washers, they are not required.
DO NOT OVER TIGHTEN, this will snap the stand-off posts!!!!

Re-attach the speaker connection by pressing the connectors together.
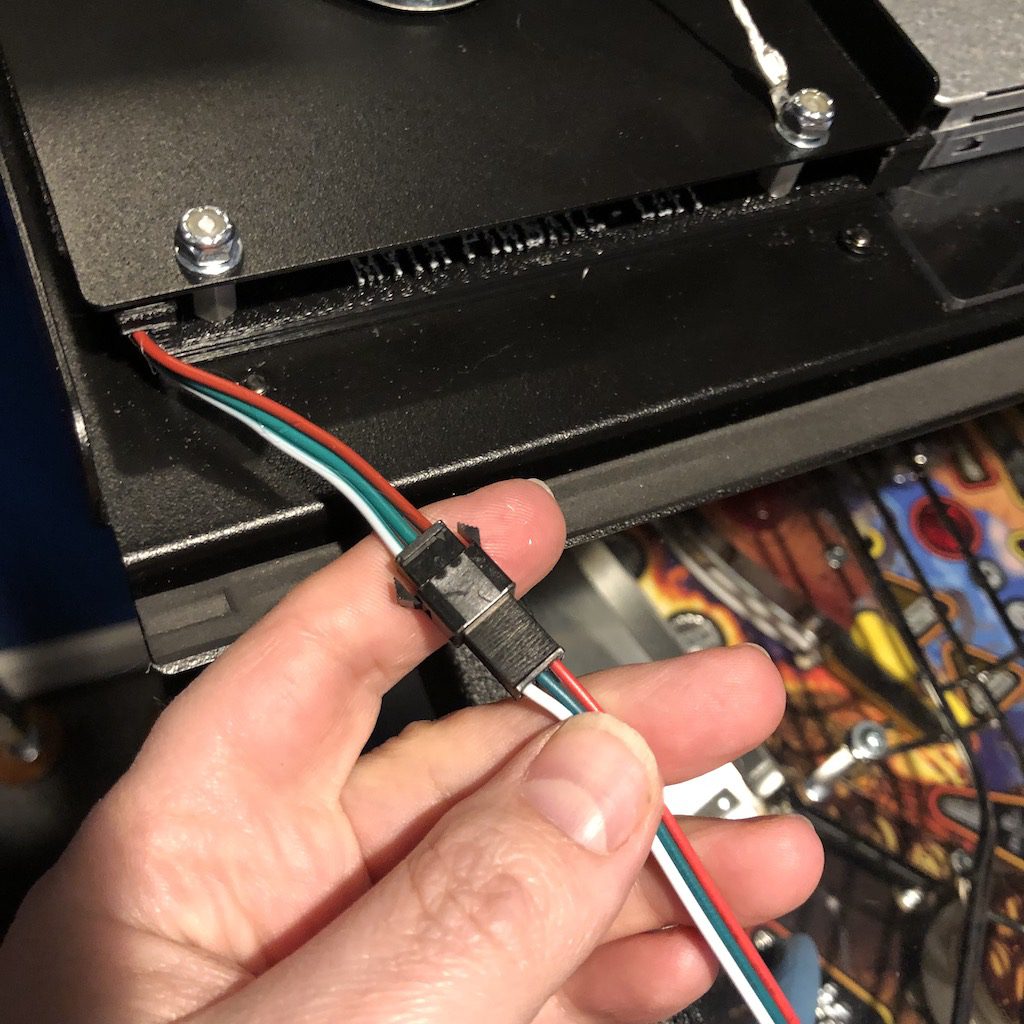
Step 5 – Install Light Frame Wire Extensions
Locate the two speaker wire extensions that came with your frame kit. You will notice one is shorter and the other is longer. The longer extension is for the RIGHT side speaker frame and the shorter extension is for the LEFT side speaker frame.
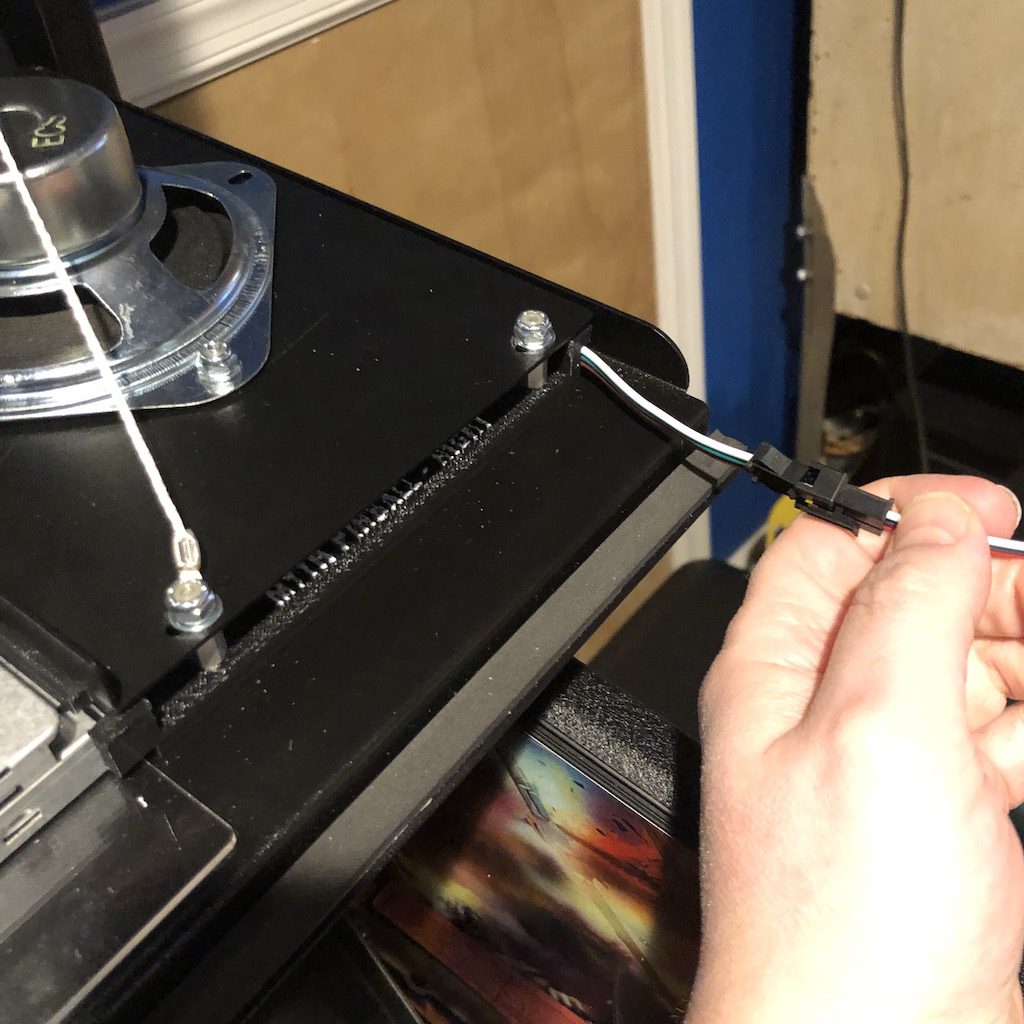
Connect the LONG extension to the right speaker frame. Line up the connector and press them together until they click.

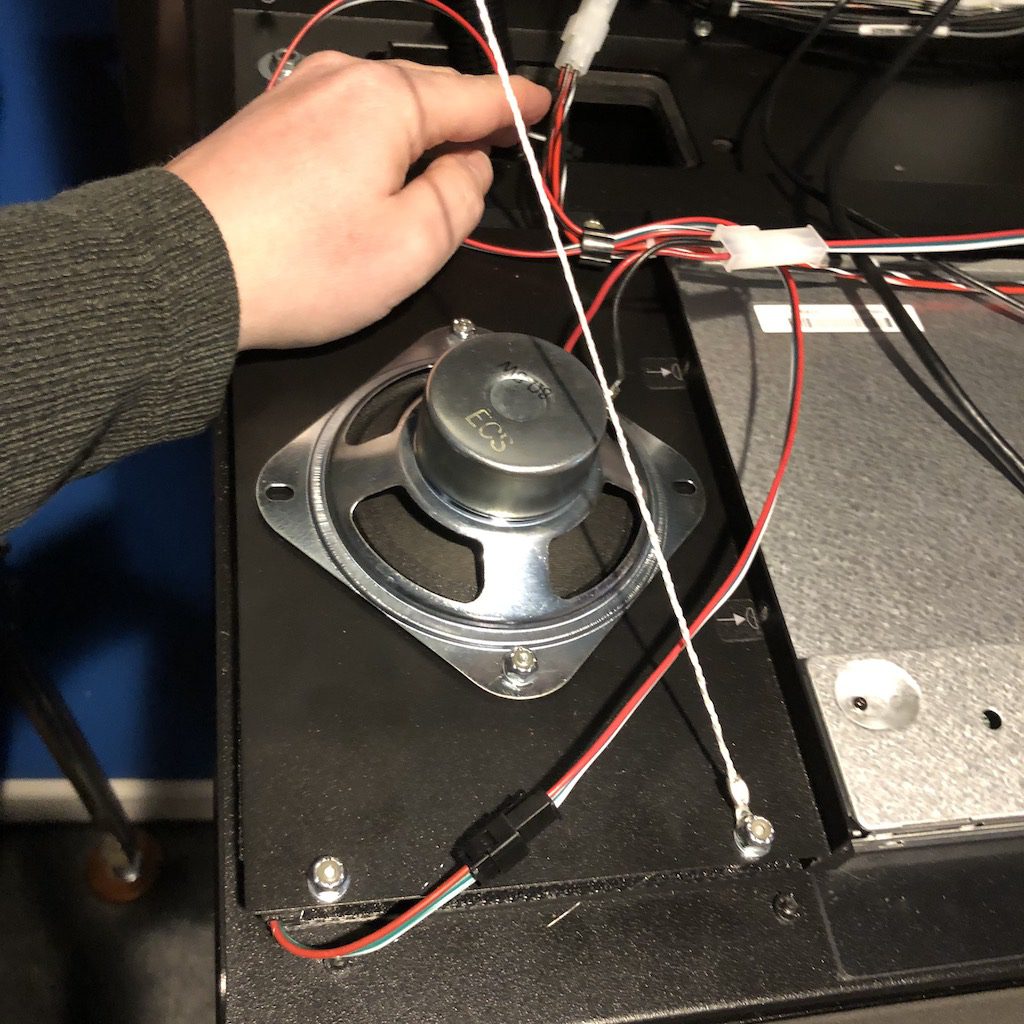
Route the wire behind the string and to the wire clip on the right speaker as shown above. Make sure it is tight enough so it does not protrude into the closing mech.
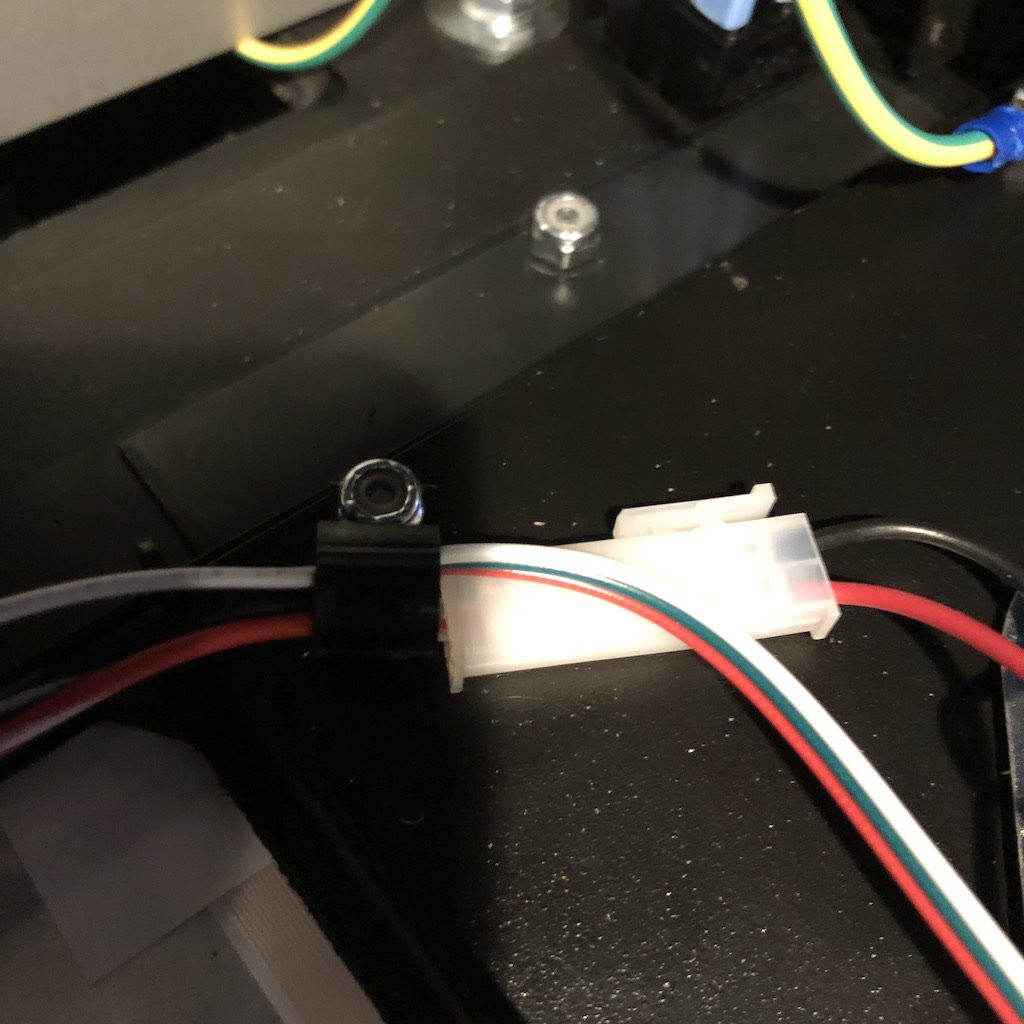
Open the wire click and push the extension wire into it.
Route the wire to the LEFT side wire clip and separate the wire clip and put the extension wire into the clip.
Optionally: Depending on how often you move the game, feel free to add wire ties to any of the wires.
Install the SHORT wire extension into the left speaker frame by clicking the wire connection together.
Route the wire behind the string and into the left wire clip.
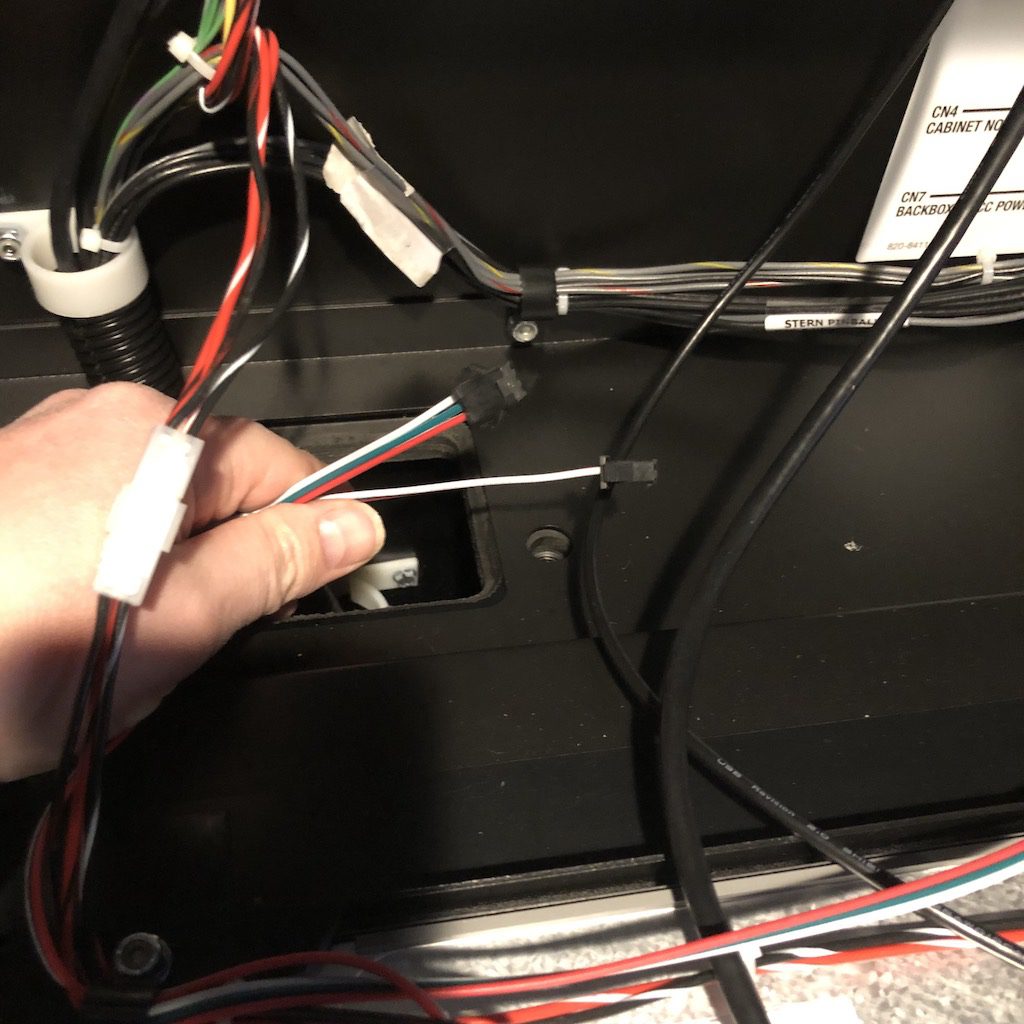
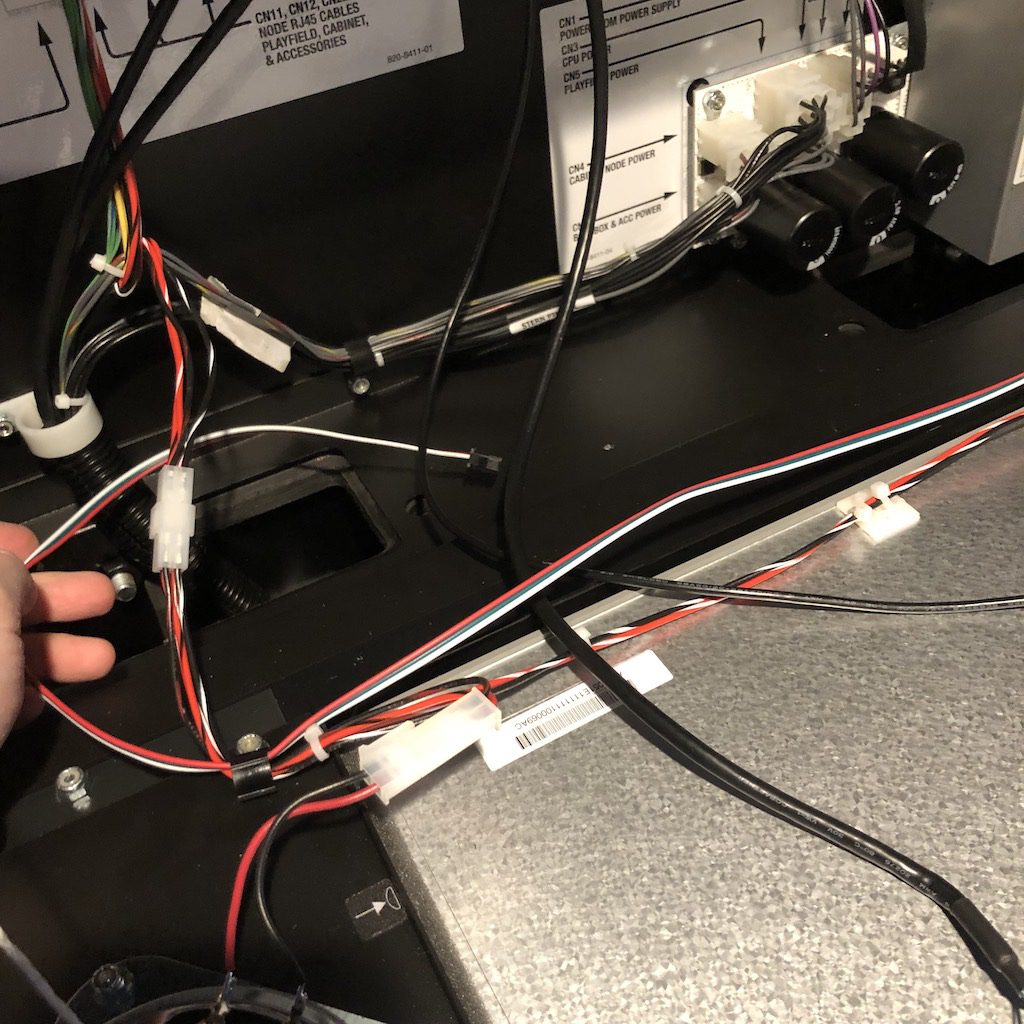
Both wires should then be routed into the head.
You have now completed your speaker light frame install and are ready to install a control box! Follow instructions on the control box page to finish the install.